As seen in . . . Vogue Knitting
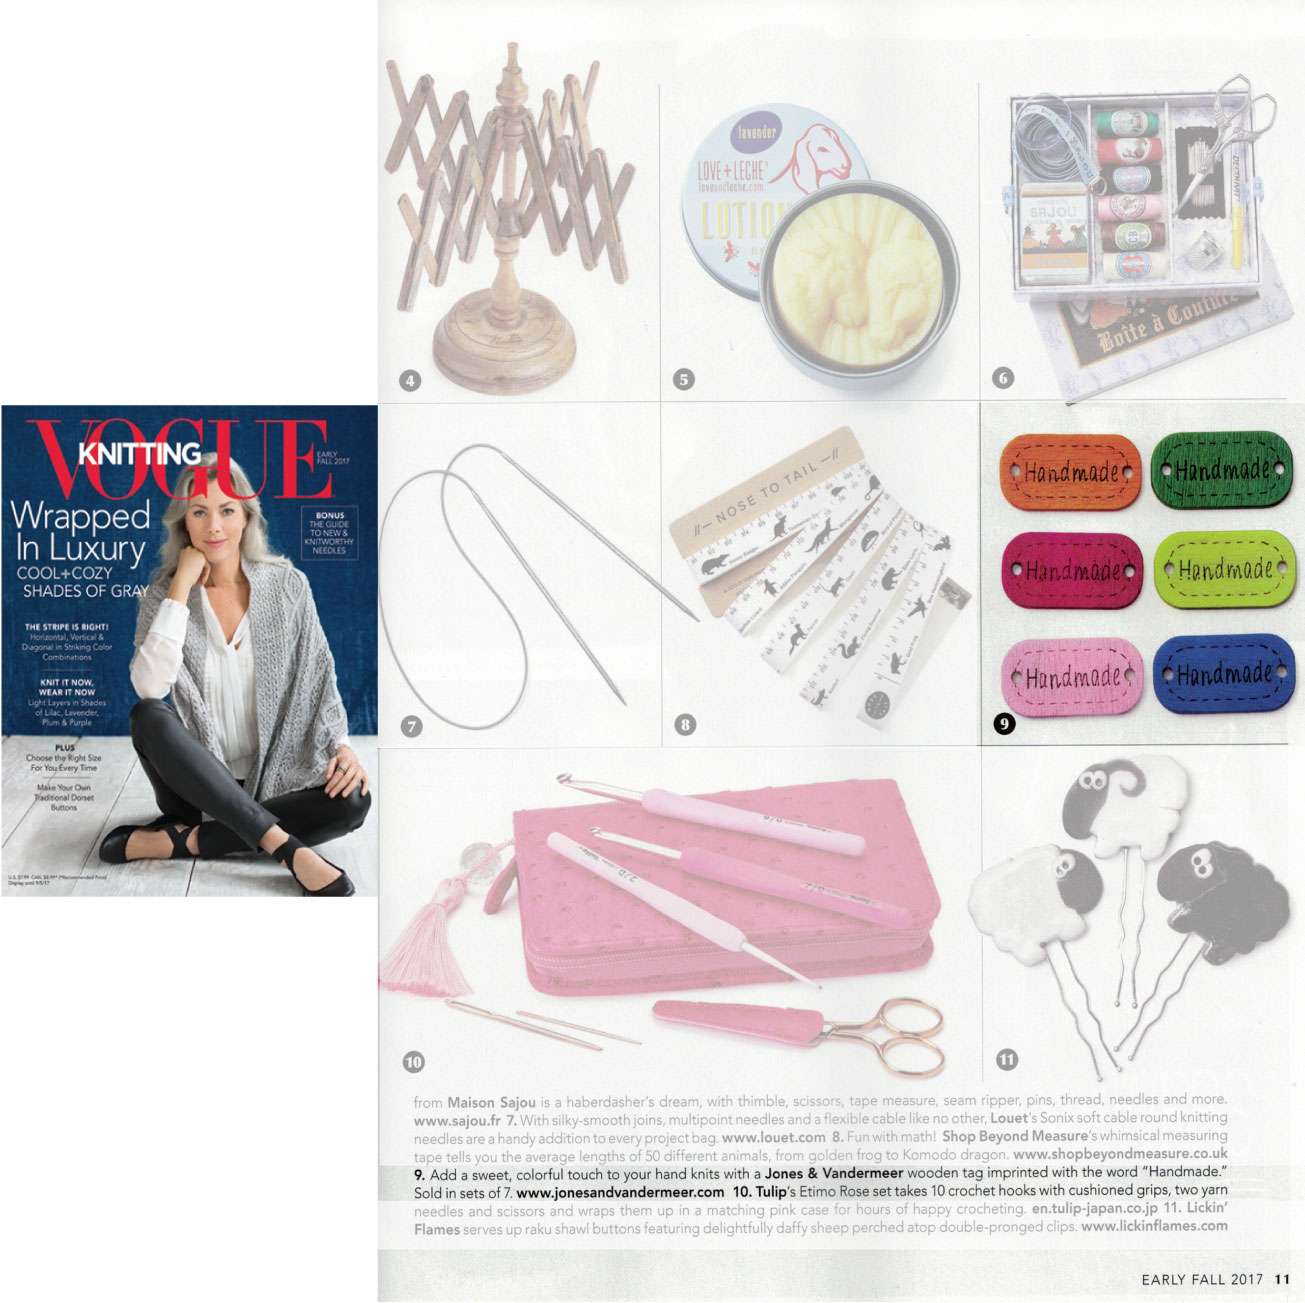
Look what we found in last week’s mail! Our colorful handmade wooden tags can be found in the Early Fall 2017 issue of Vogue Knitting. A fun finishing touch to any handmade gift!

Look what we found in last week’s mail! Our colorful handmade wooden tags can be found in the Early Fall 2017 issue of Vogue Knitting. A fun finishing touch to any handmade gift!
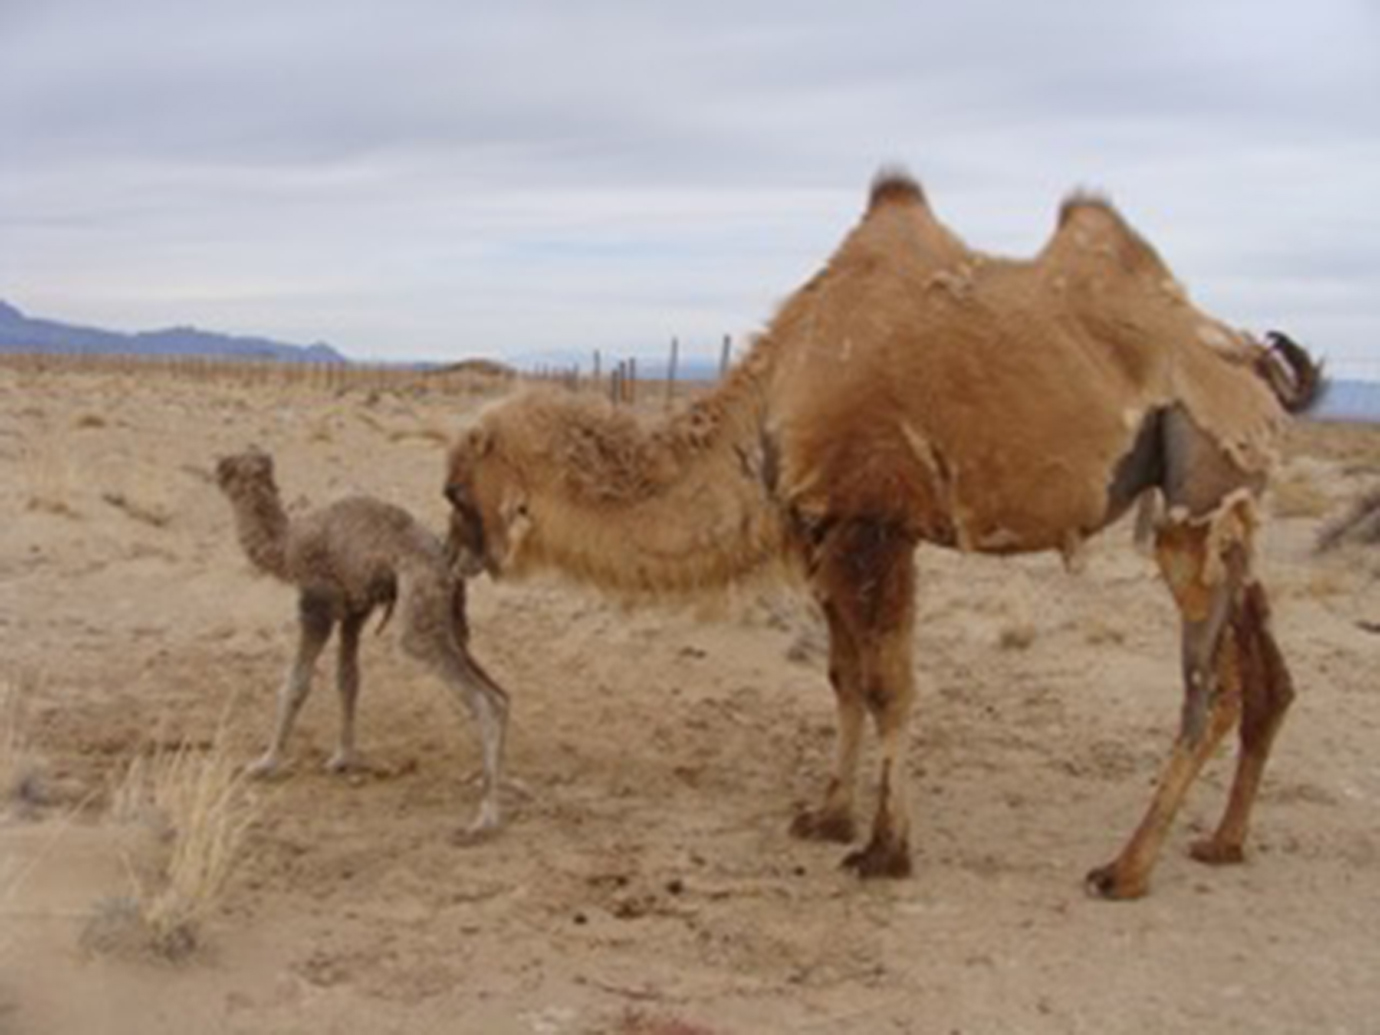
John sent along this photo of a newly born wild camel calf at the WCPF’s Breeding Center taking its very first wobbly steps!
The mother camel is in the process of shedding her winter coat. The caretakers at the preserve pick-up the fiber as it’s shed — eventually spinning it into yarn and knitting it into warm hats and scarves. (Last I checked, there were a few examples on WCPF’s website).
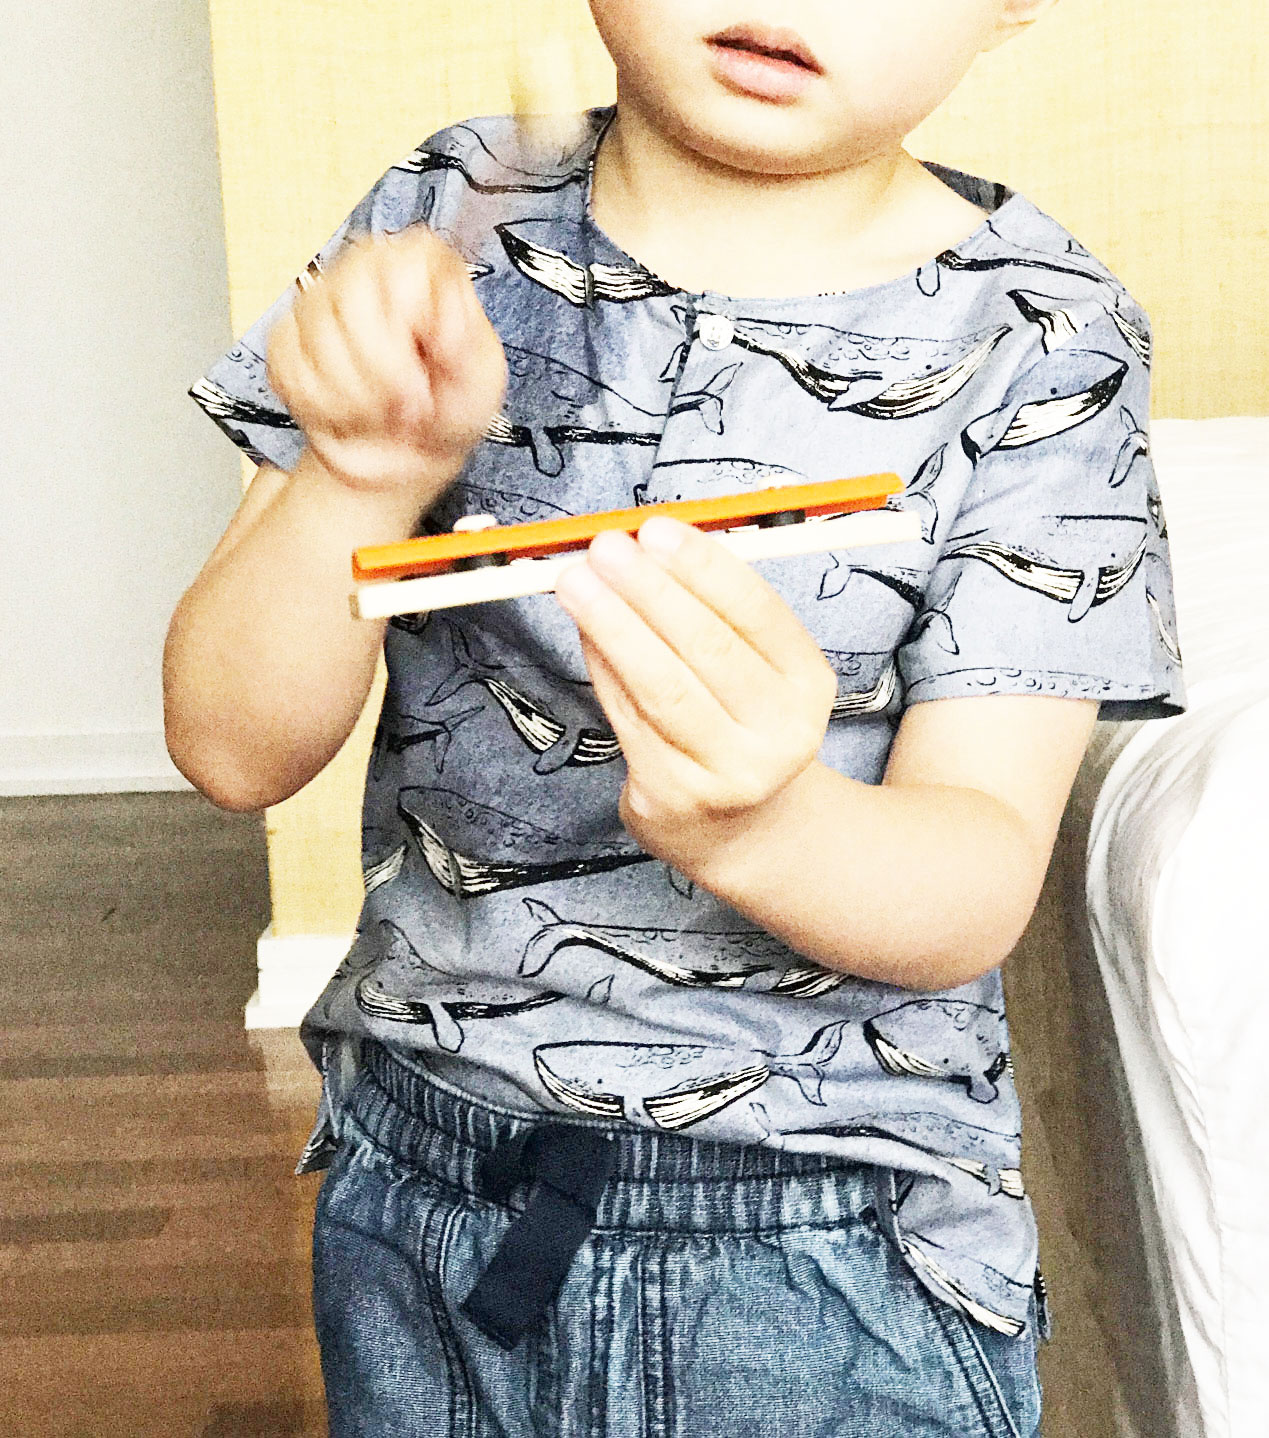
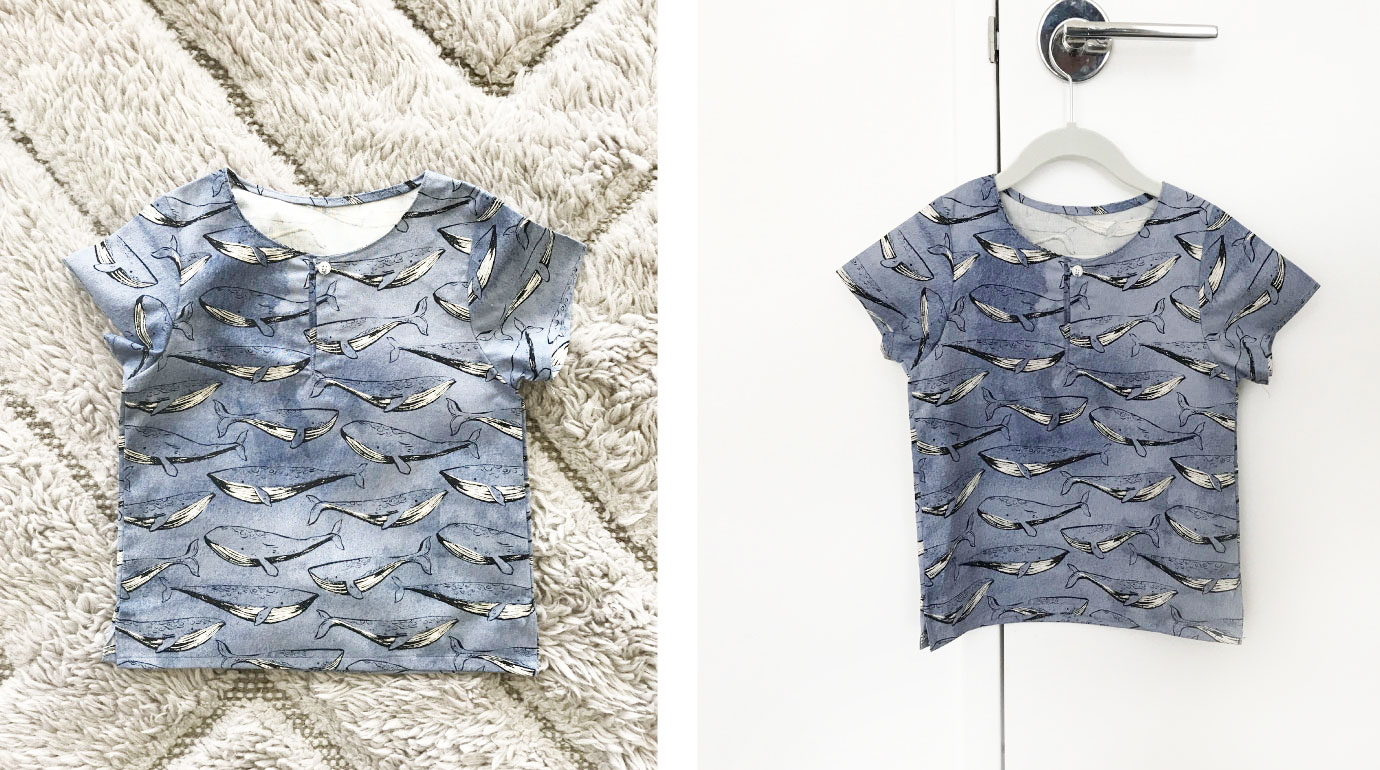
so the Kid stopped by the studio the other day . . . and decided he needed to do a bit of shopping. he picked out 3 fabrics for his bespoke shirtmaker (aka yours truly) to fashion into shirts.
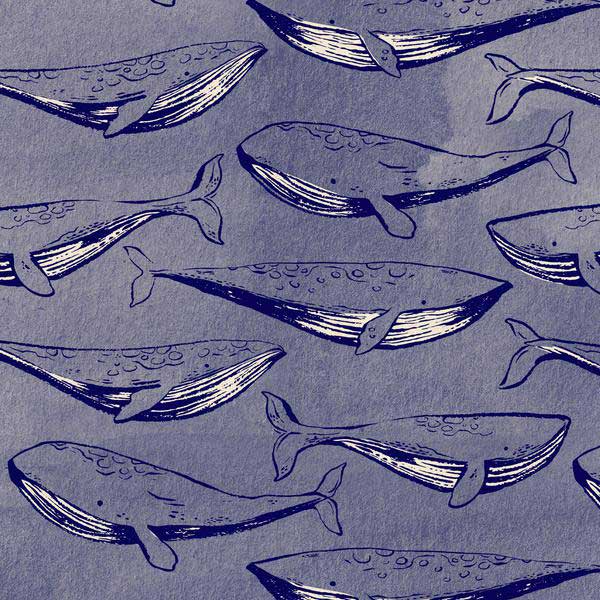
The first one shown here is Fred & Carrie from Cotton + Steel’s SS Bluebird collection.
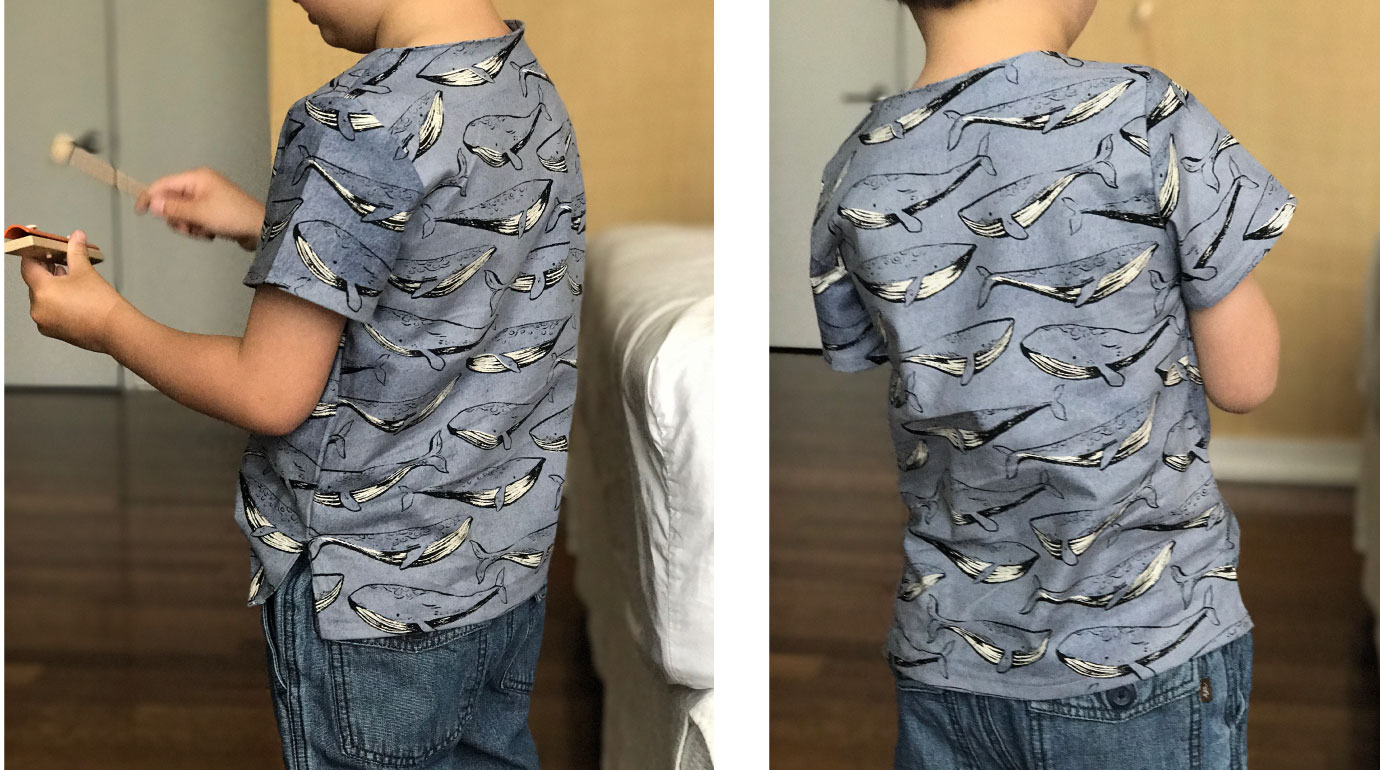
The pattern is Dans La Lune’s Everyday Shirt pattern. I made one about a year ago in Kokka’s Boston Terrier Double Gauze. It was a bit big at the time, but my how the Kid has grown into a size 6 since then! For reference, the Kid is 44.5 inches and weighs 43-44 lbs.
Stay tuned for more of the shirts made from the Kid’s fabric haul!
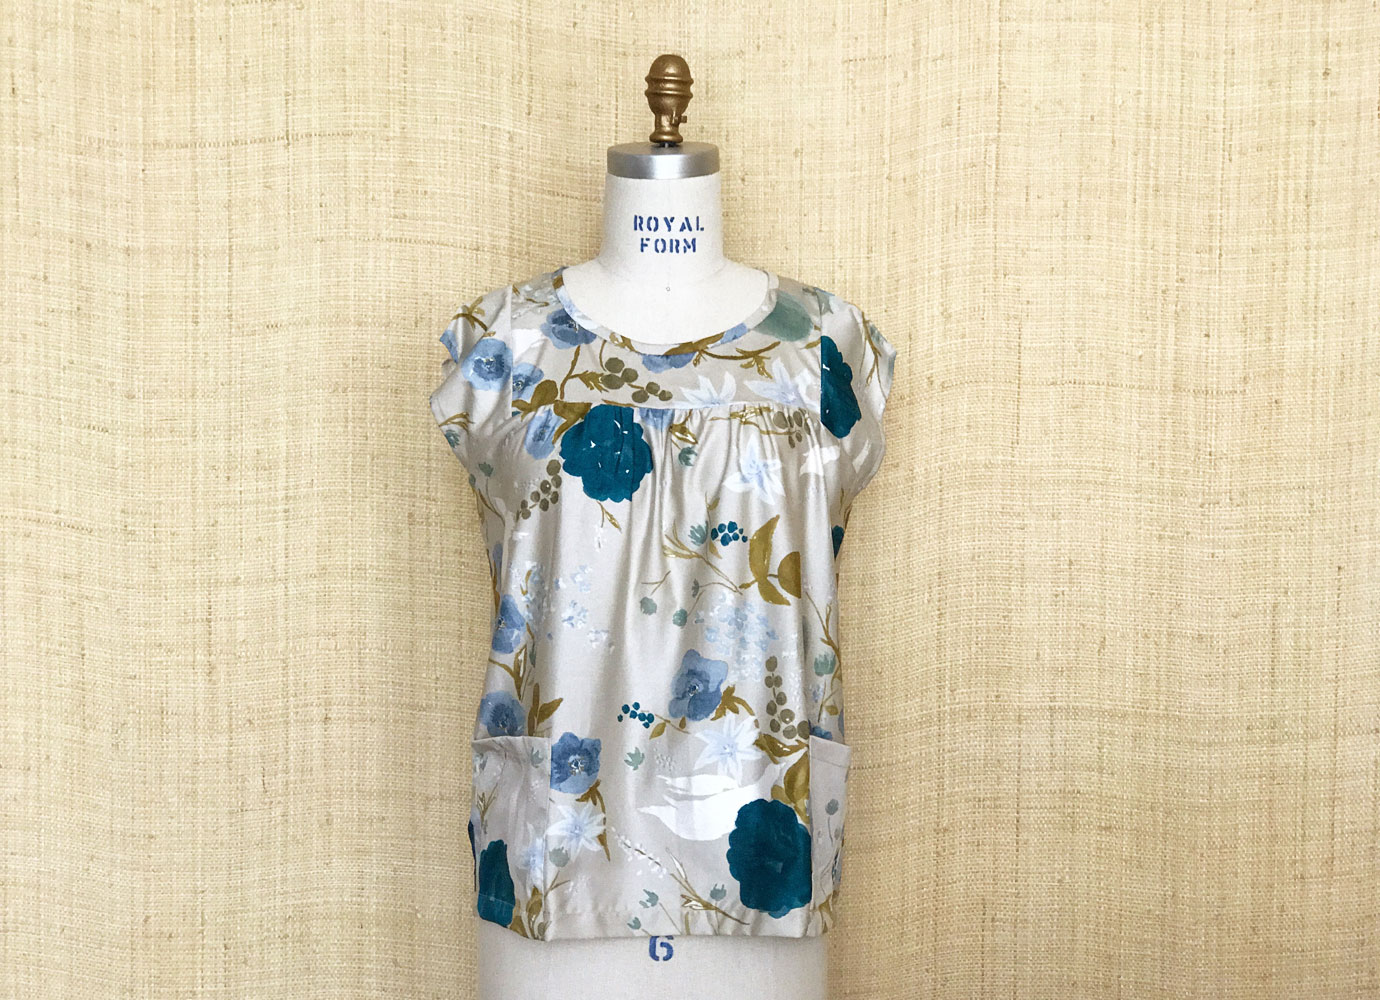
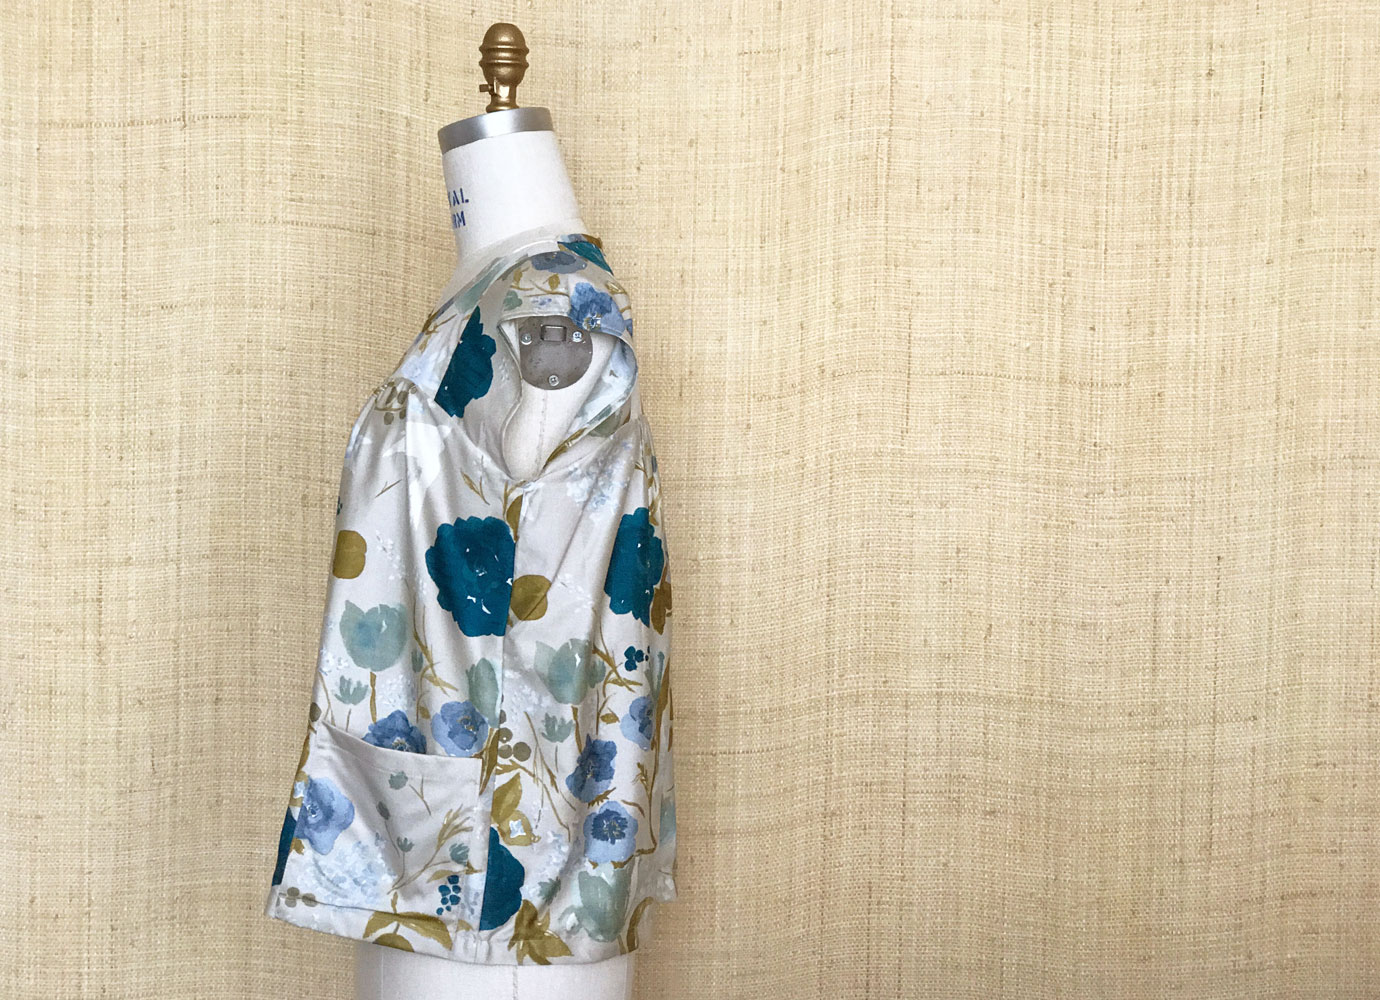
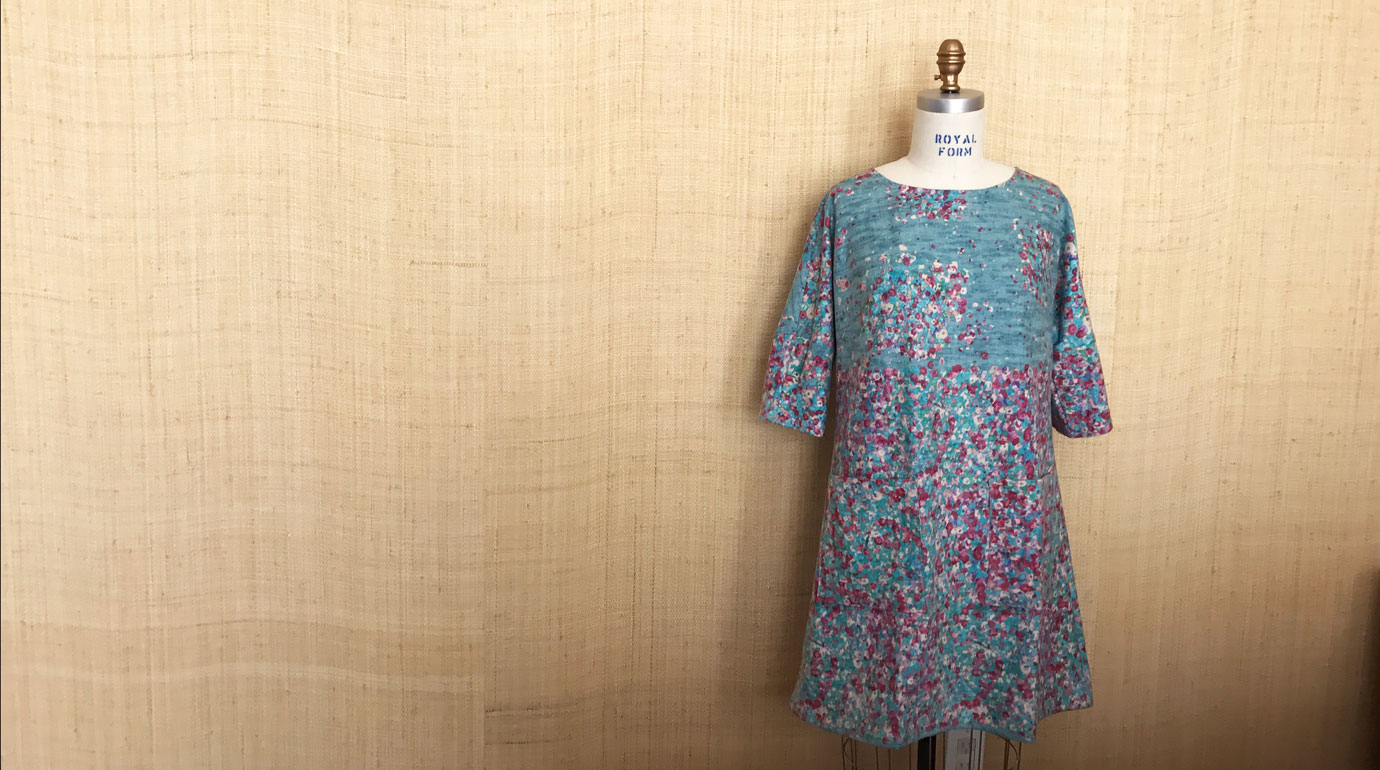
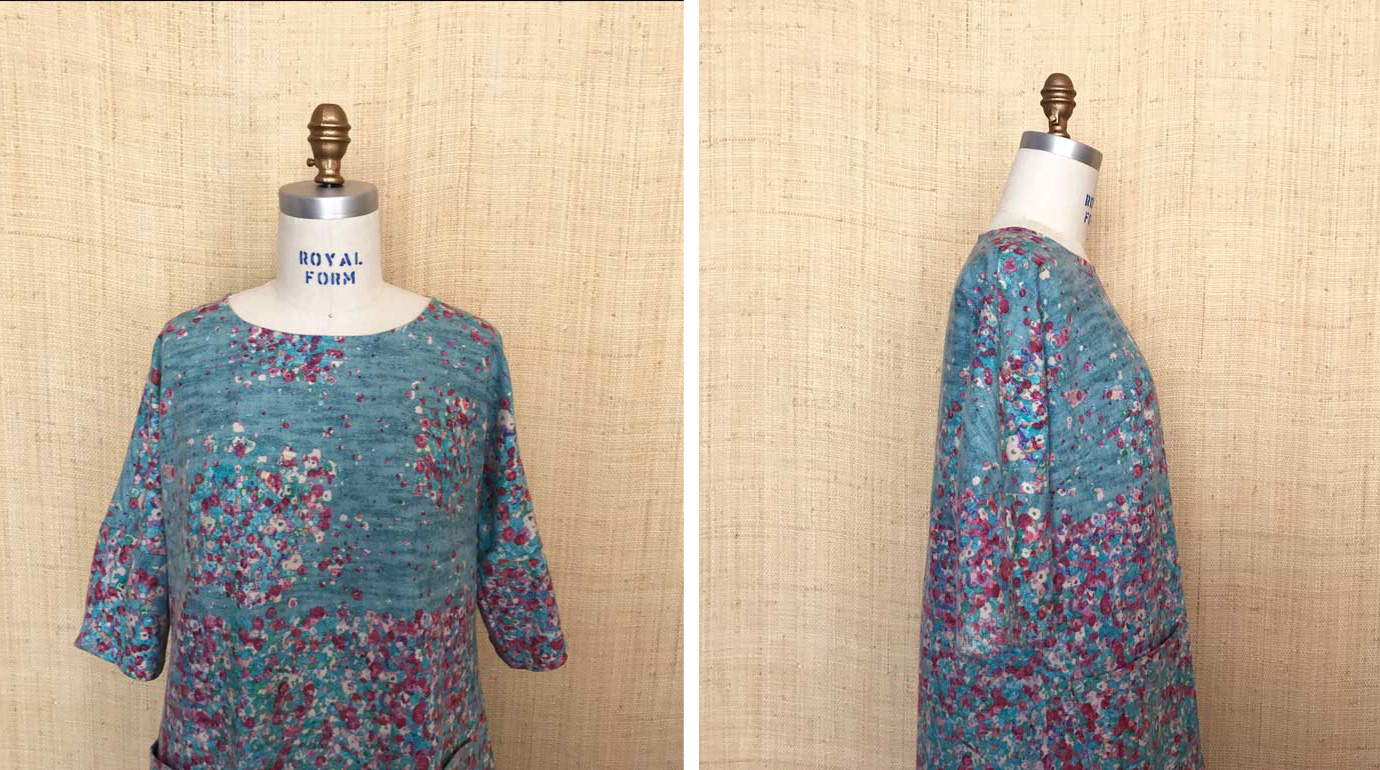
Soleil is turning out to be one of my favorite shirts to live in during the warmer months. It’s got pockets, a super easy shape (read: no need to suck your stomach in at all times), and enough gatherings to give it movement without being overly fussy. I wear it with skinny jeans and denim shorts too.
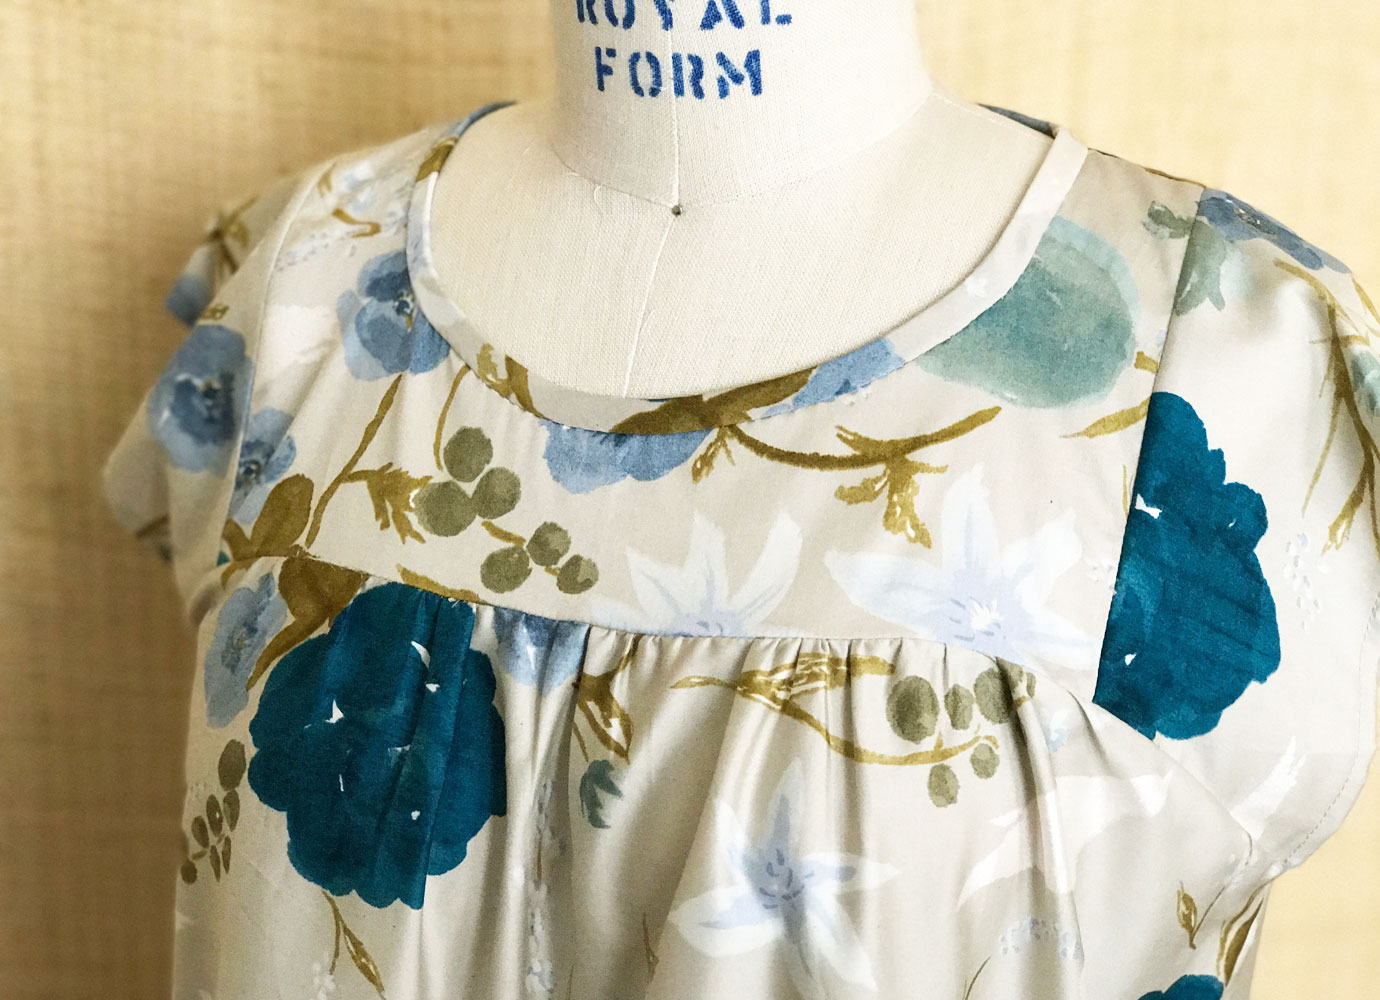
The main change I made between versions was to change to a rounded neckline. The prior version was a square neckline. I thought the rounded neckline paired more gracefully with the Fuccra Rakuen’s gorgeous florals.
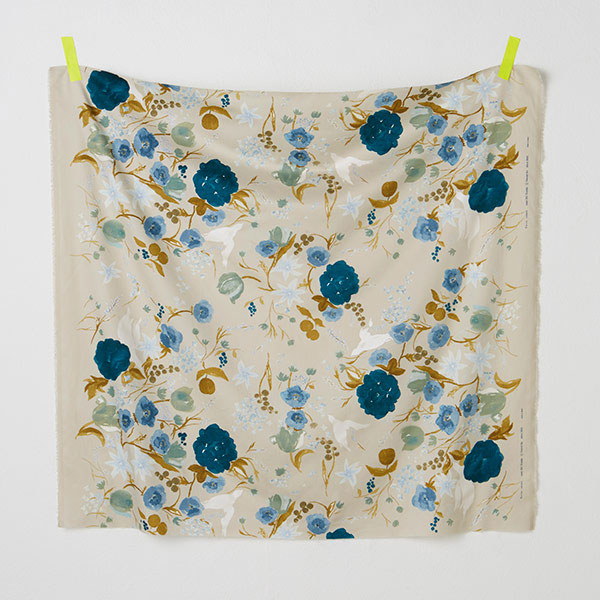
On the topic of fabric, we just received a few bolts of Nani Ito’s Fuccra Rakuen Cotton Sateen in the shop: Mallorca, Amalfi (above), and Phi Phi. The cotton sateen has a subtle lustre with a sumptuous drape. A bit heavier than lawn, it sews wonderfully! Did I mention that the entire garment is sewn with french seams?
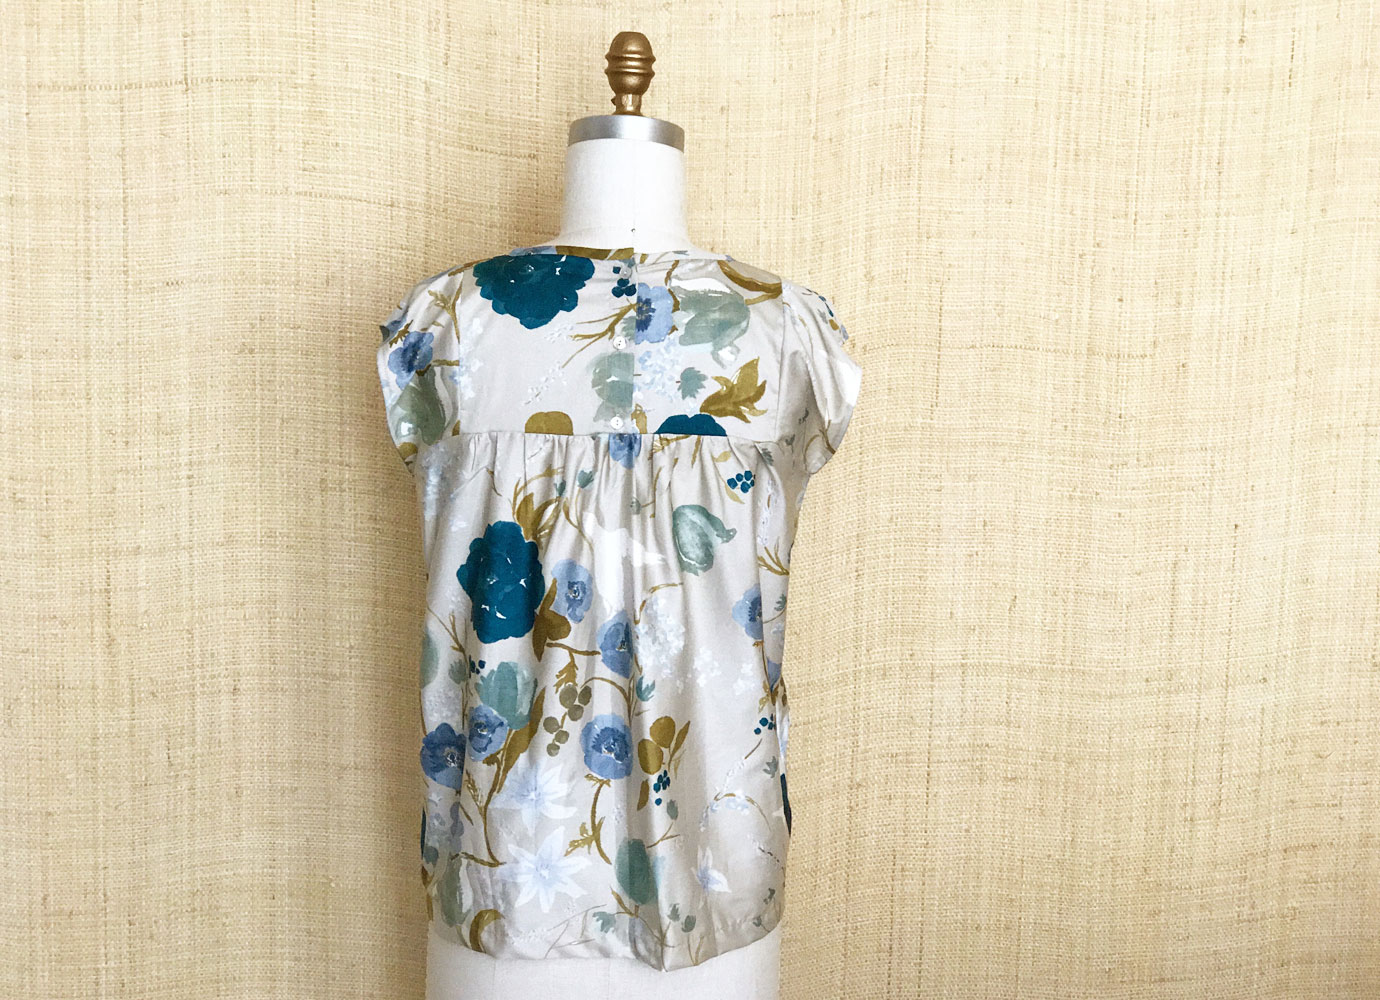
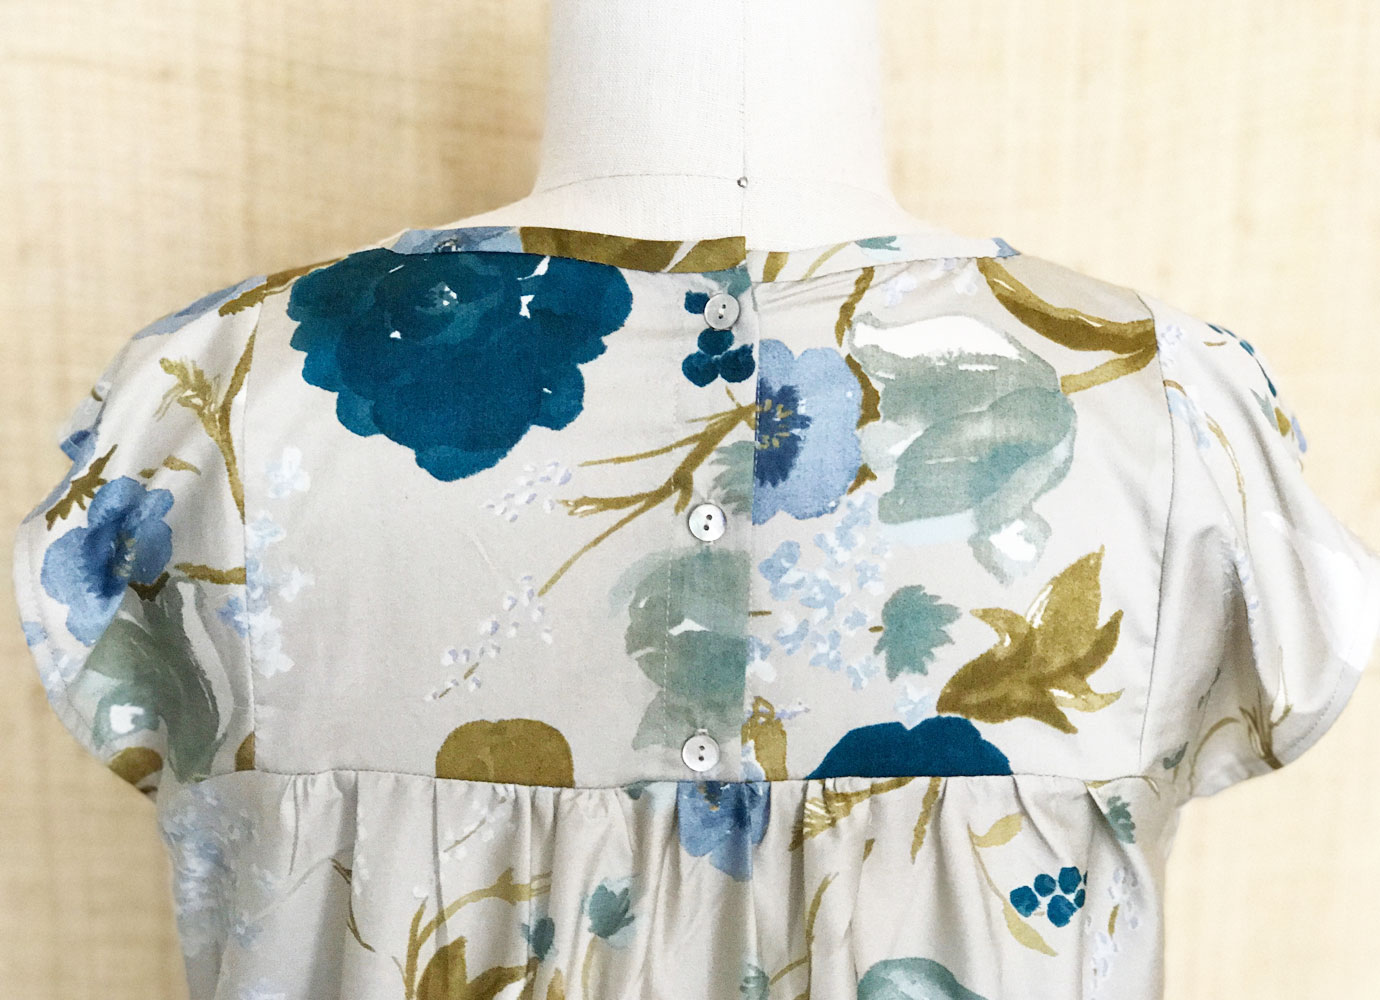
I probably should have done a better job spacing the buttons out. Notes for next time! (The buttons can be found here.)
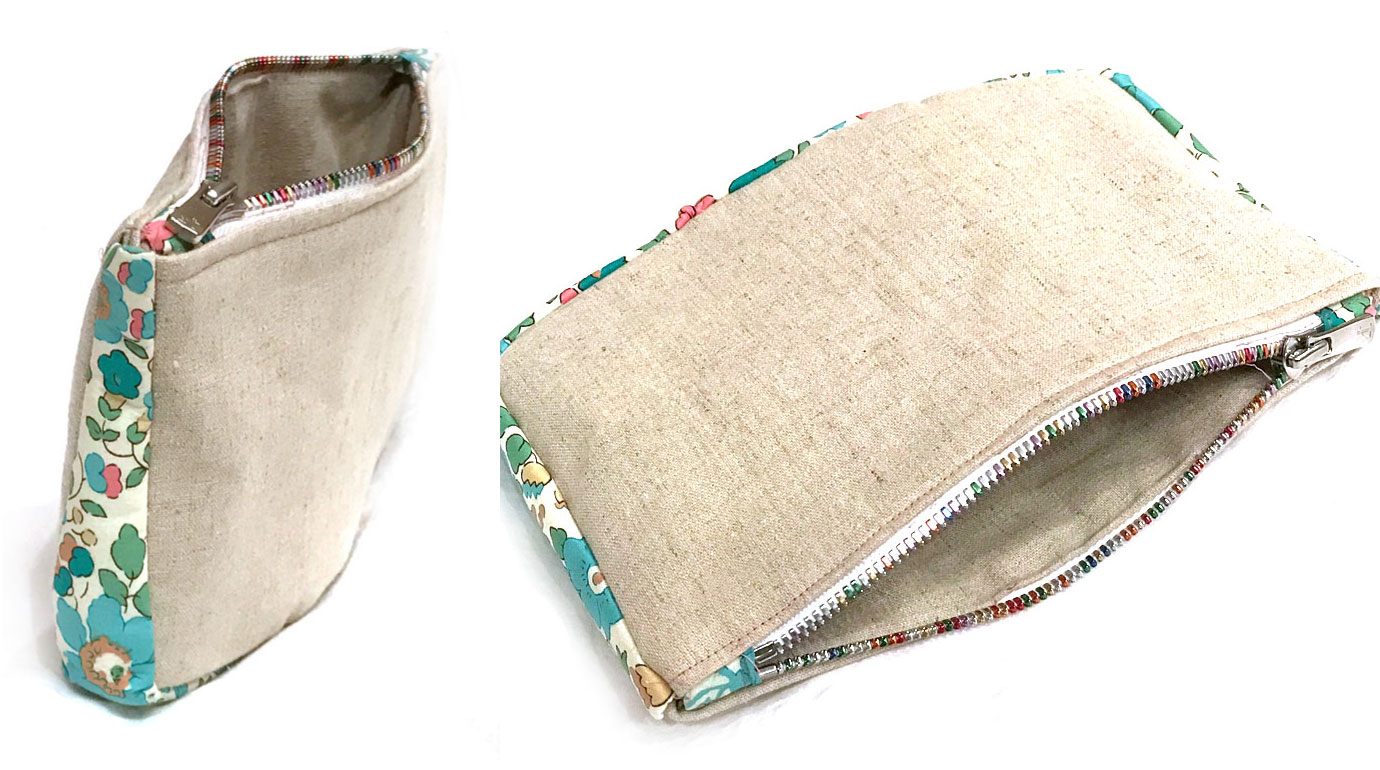
while doing a bit of housekeeping in the studio, i rediscovered a YKK rainbow zipper that i had received as a sample and meant to do something with but somehow misplaced in the process. to make a long story short, i finally got around to doing something with the zipper last week. i know i know, people usually buy zippers with a certain existing project in mind. this zipper (look at its cheerful rainbow teeth) demanded that a project be adapted to fit it!

i decided to use just a bit of liberty as an accent, so that the rainbow hued teeth on the zipper could shine on their own without having to compete too much with the liberty.
here’s what i did . . .
Materials
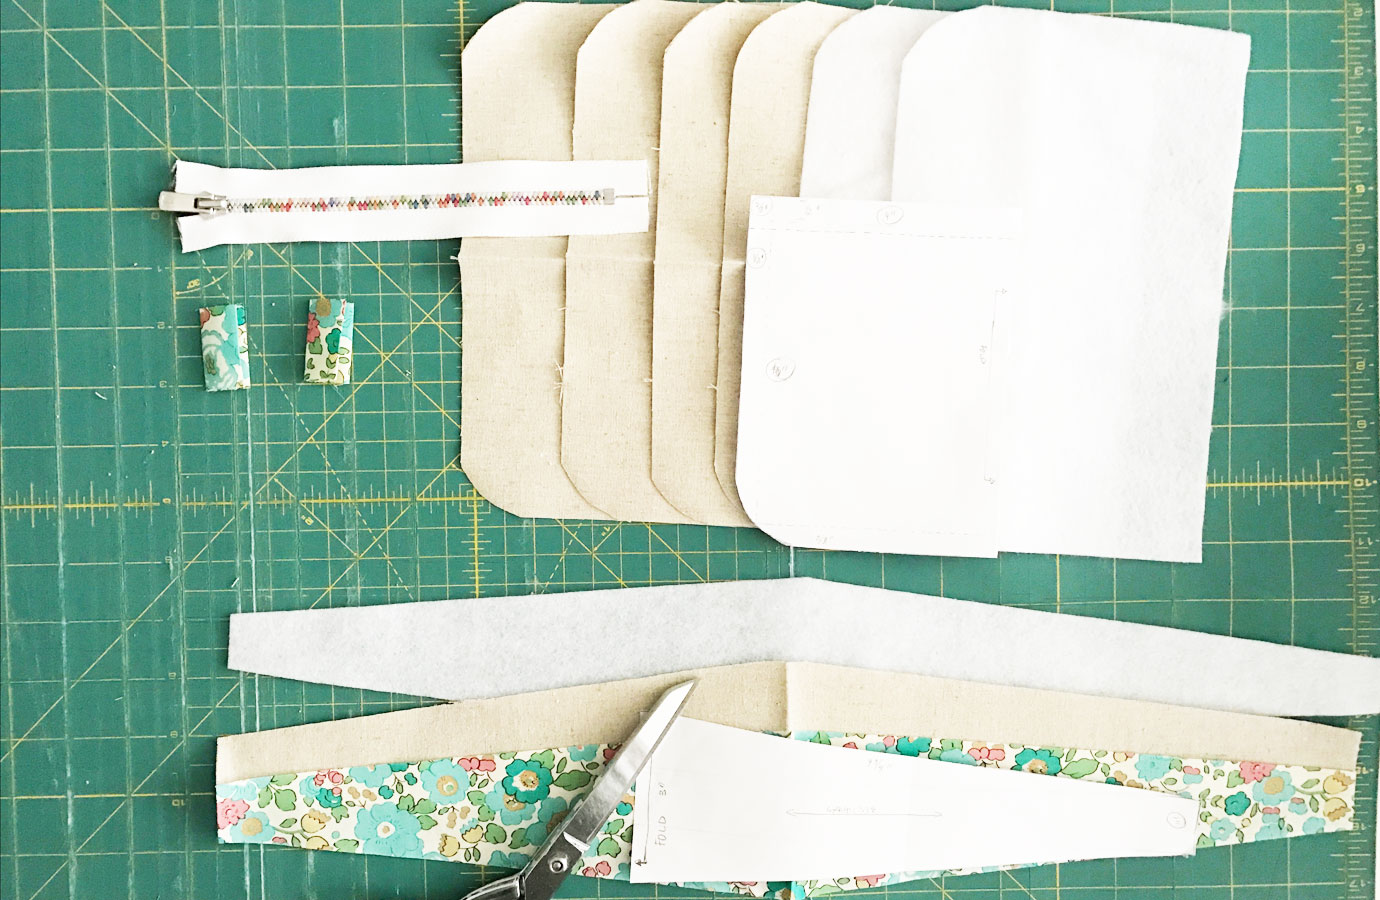
Cut out Patterns
Prepare the Fabric
Now to Sew
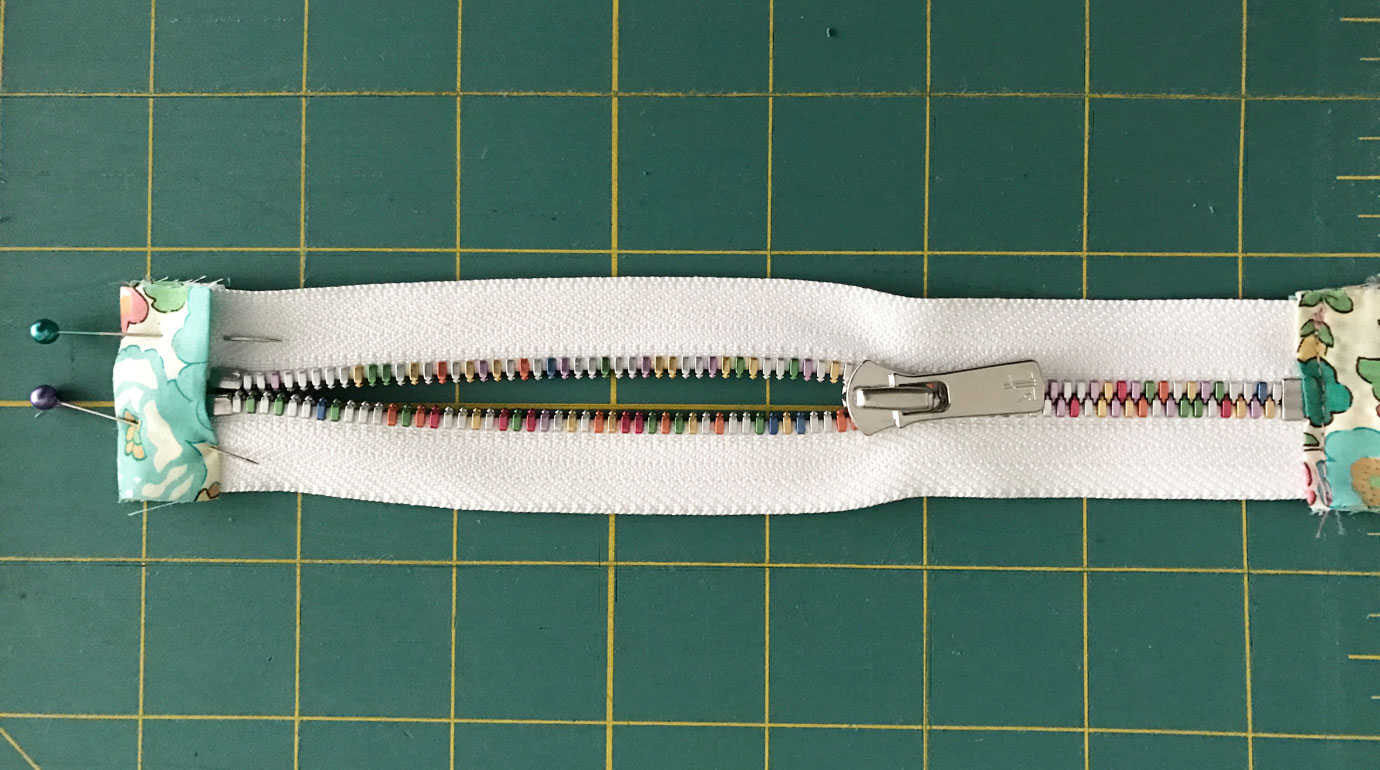
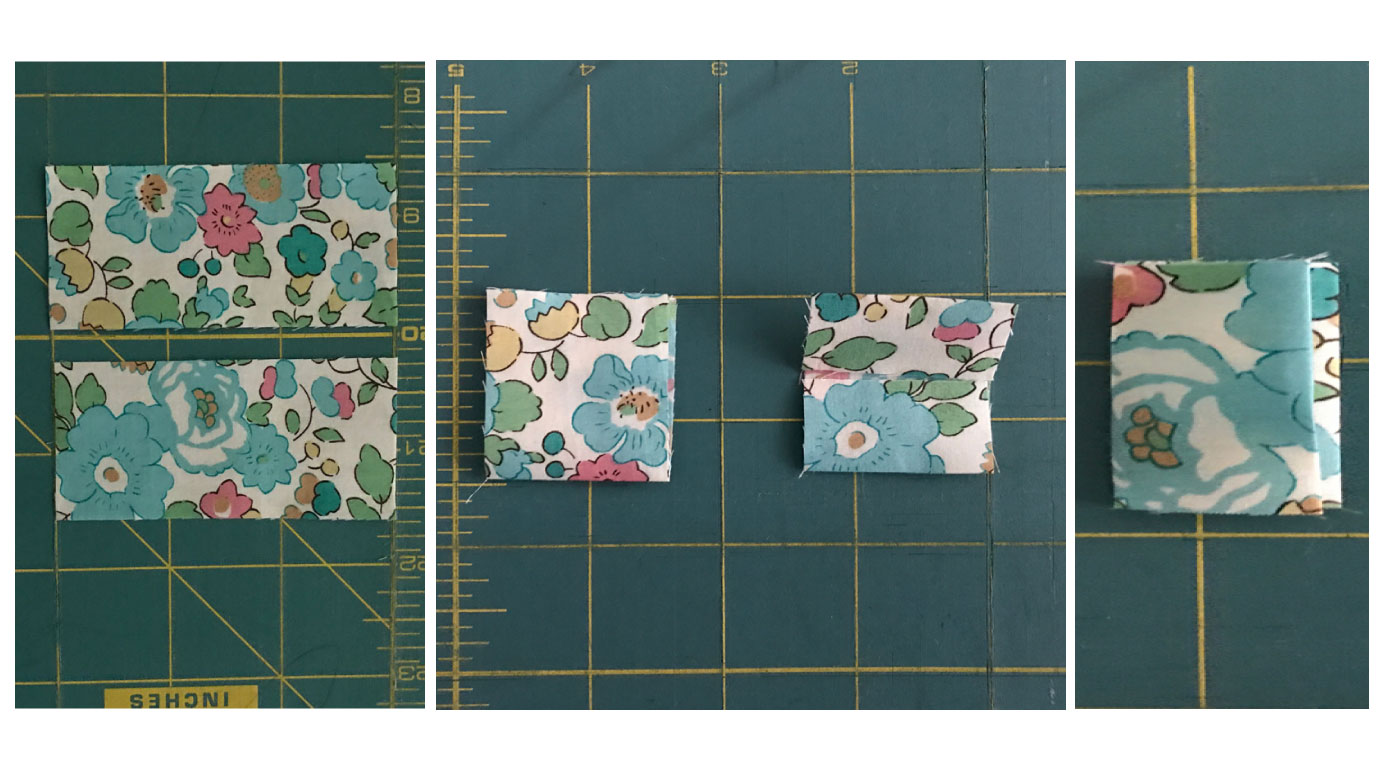
Install zipper foot on your machine. Then, sandwich the zipper tabs on the ends of the zipper and sew in place (about 1/8″ from the metal zipper stop. You may need to snip off the ends of the zipper fabric to get a good fit. When sewing with a metal zipper (as is the case here) make sure that you do not sew onto the metal zipper stop or teeth, as your needle will break.
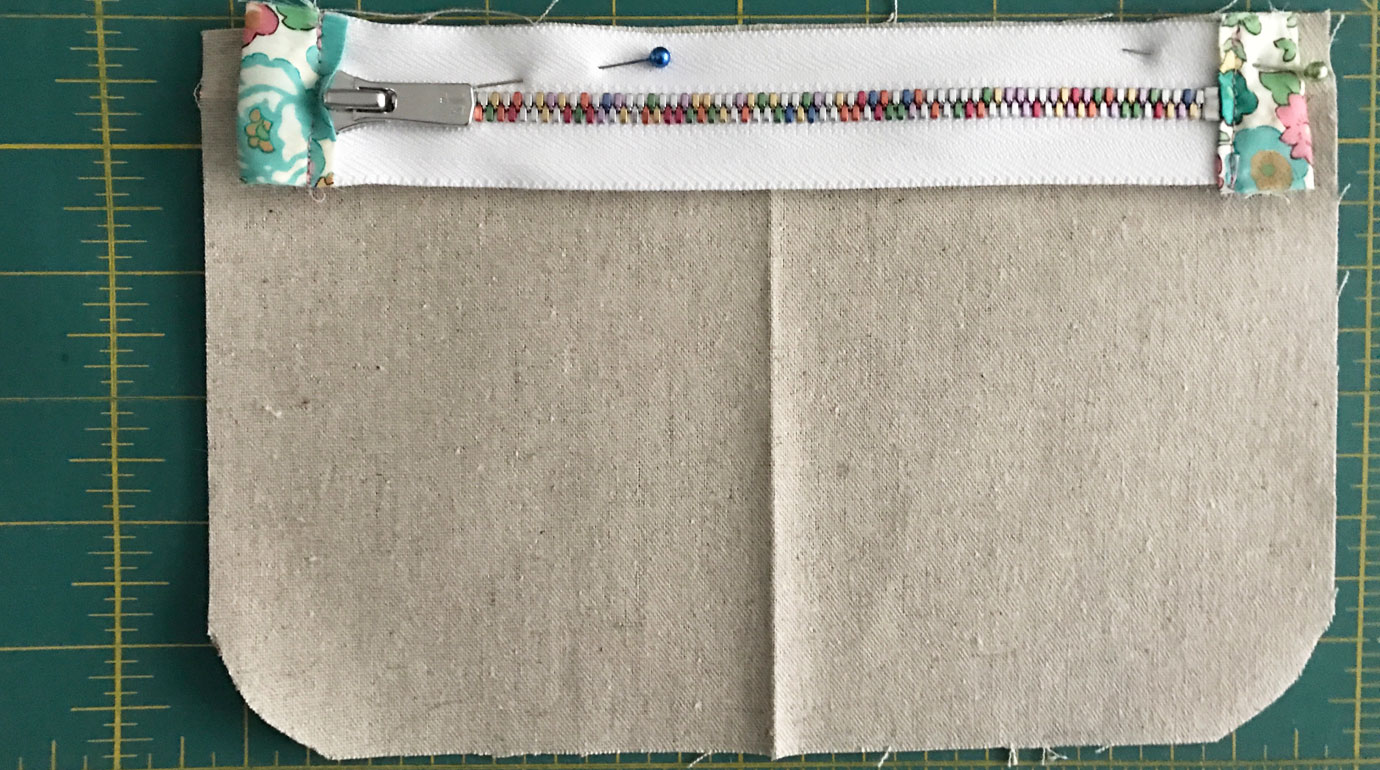
Center the lining against the zipper with the top edge aligned to the zipper. The right side (RS) of the lining should be touching the wrong side (WS) of the zipper. With a basting stitch, sew 1/4″ from the edge of the metal teeth.

Repeat for other side. It will look like this from the WS of the zipper when done.
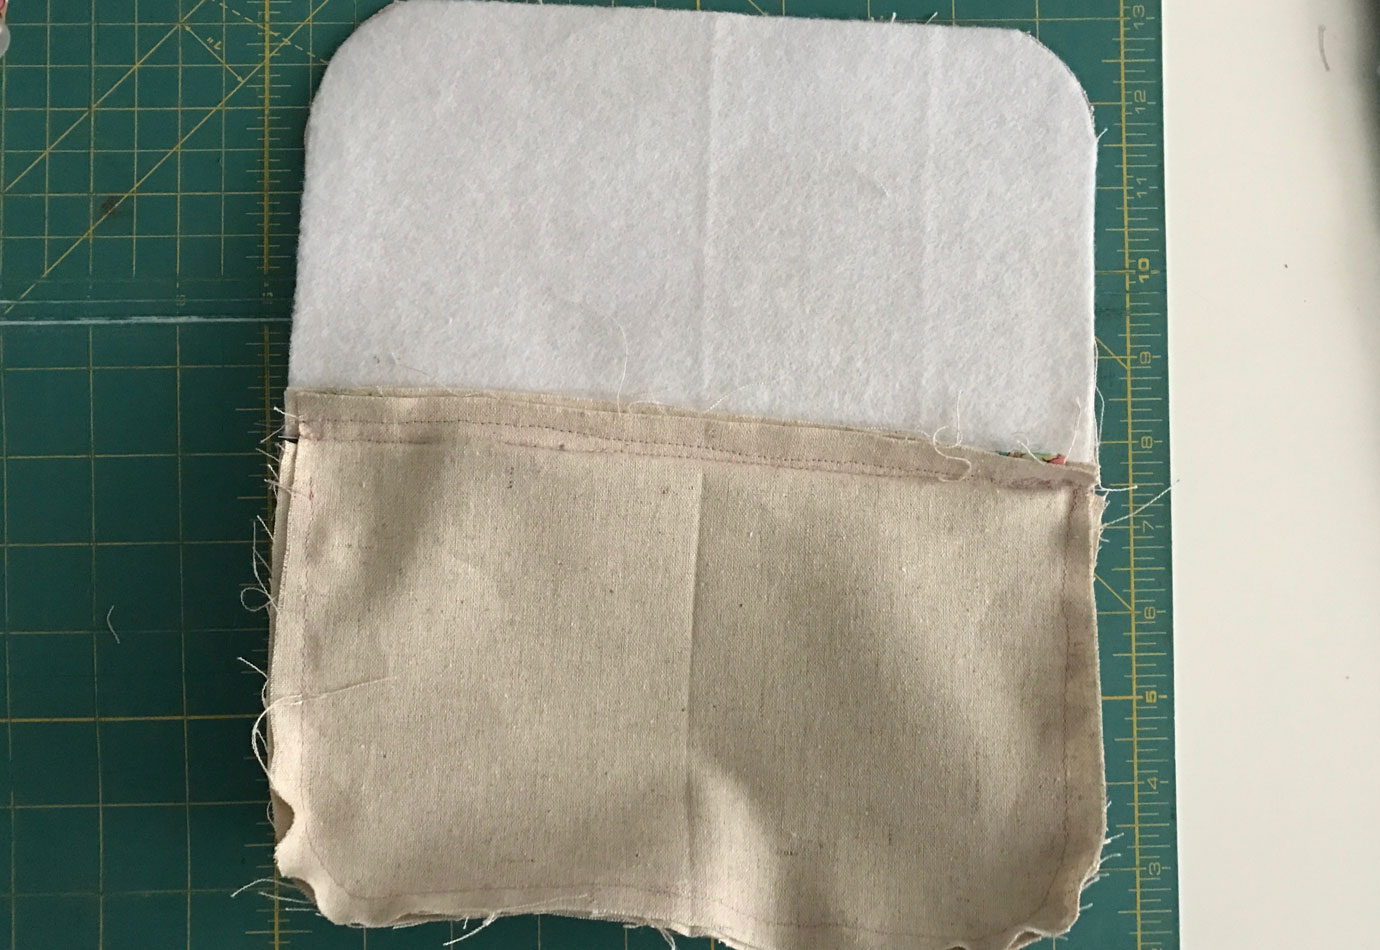
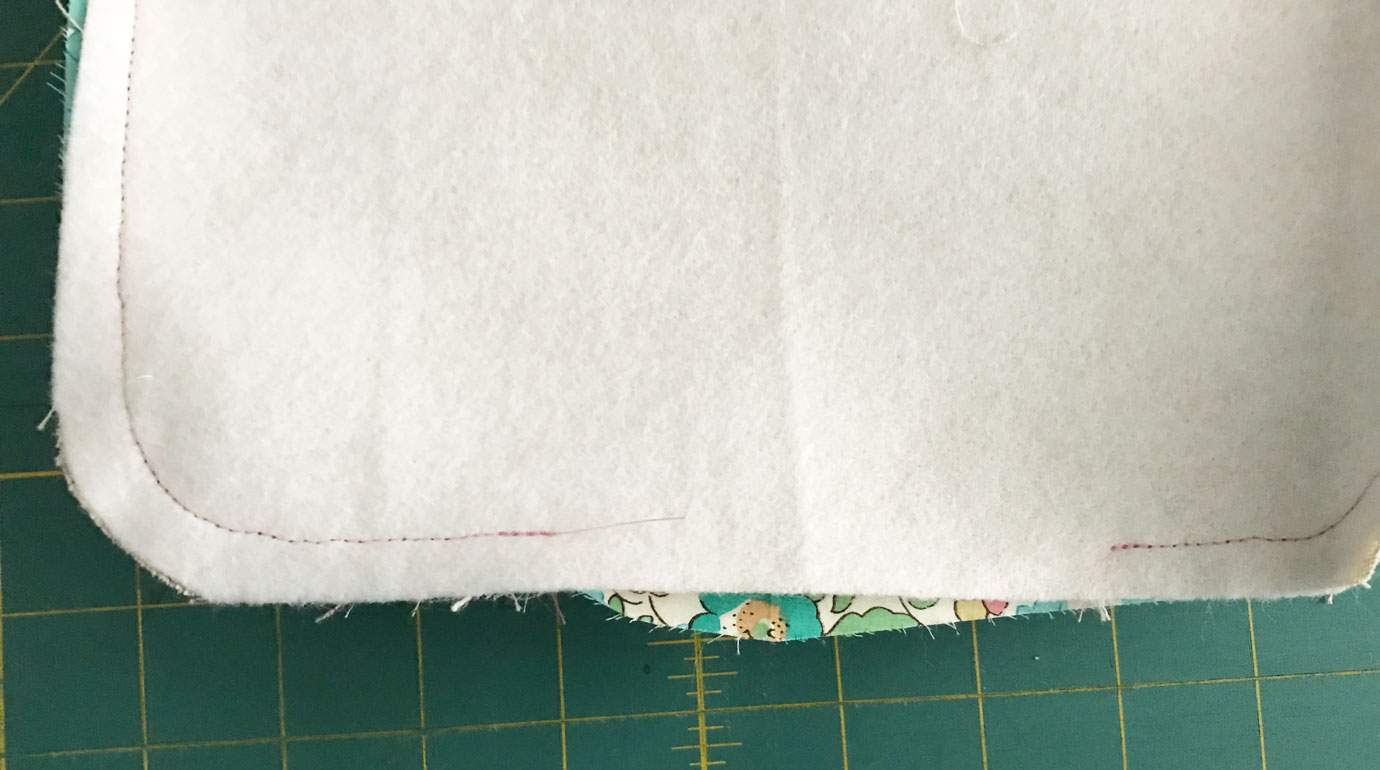
Next, fold the top edge of the Body piece 1/2″. Press the crease with an iron. With the seam allowance tucked under, place the Body piece next to the zipper, aligning the bottom and side edges of the Body piece agains the lining. Sew 1/4″ from the zipper’s metal teeth. You will be sewing through quite a few layers here (the Body piece, the folded seam allowance, the zipper, the Fusible Fleece and the Lining).
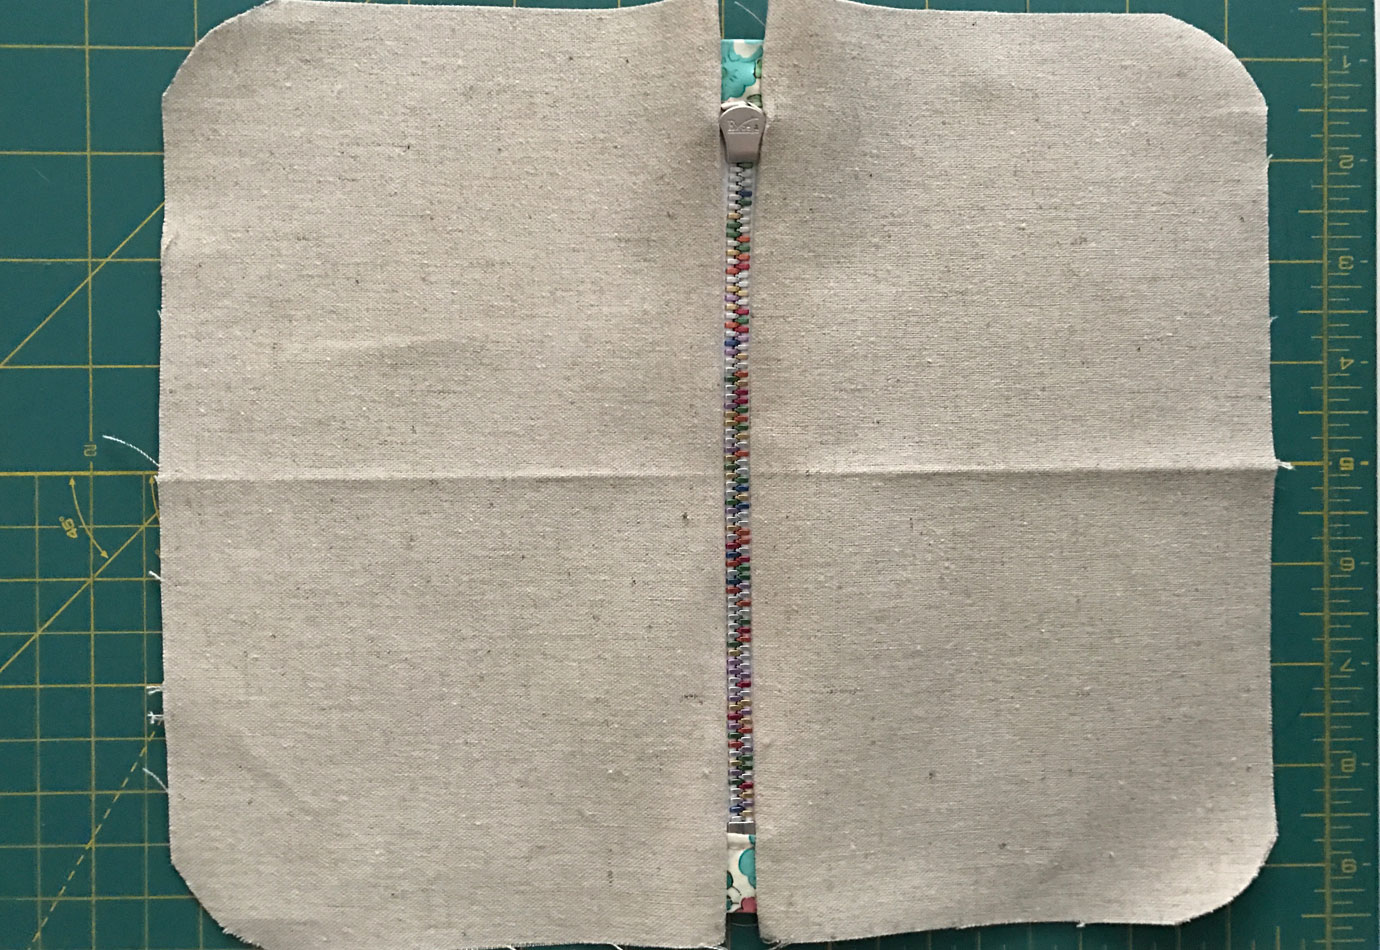
Repeat for other side. It will look like this when done (yes, I went a bit wonky on the alignment and sewing but you’ll be much straighter than me! )
Remove the basted stitches from prior steps.

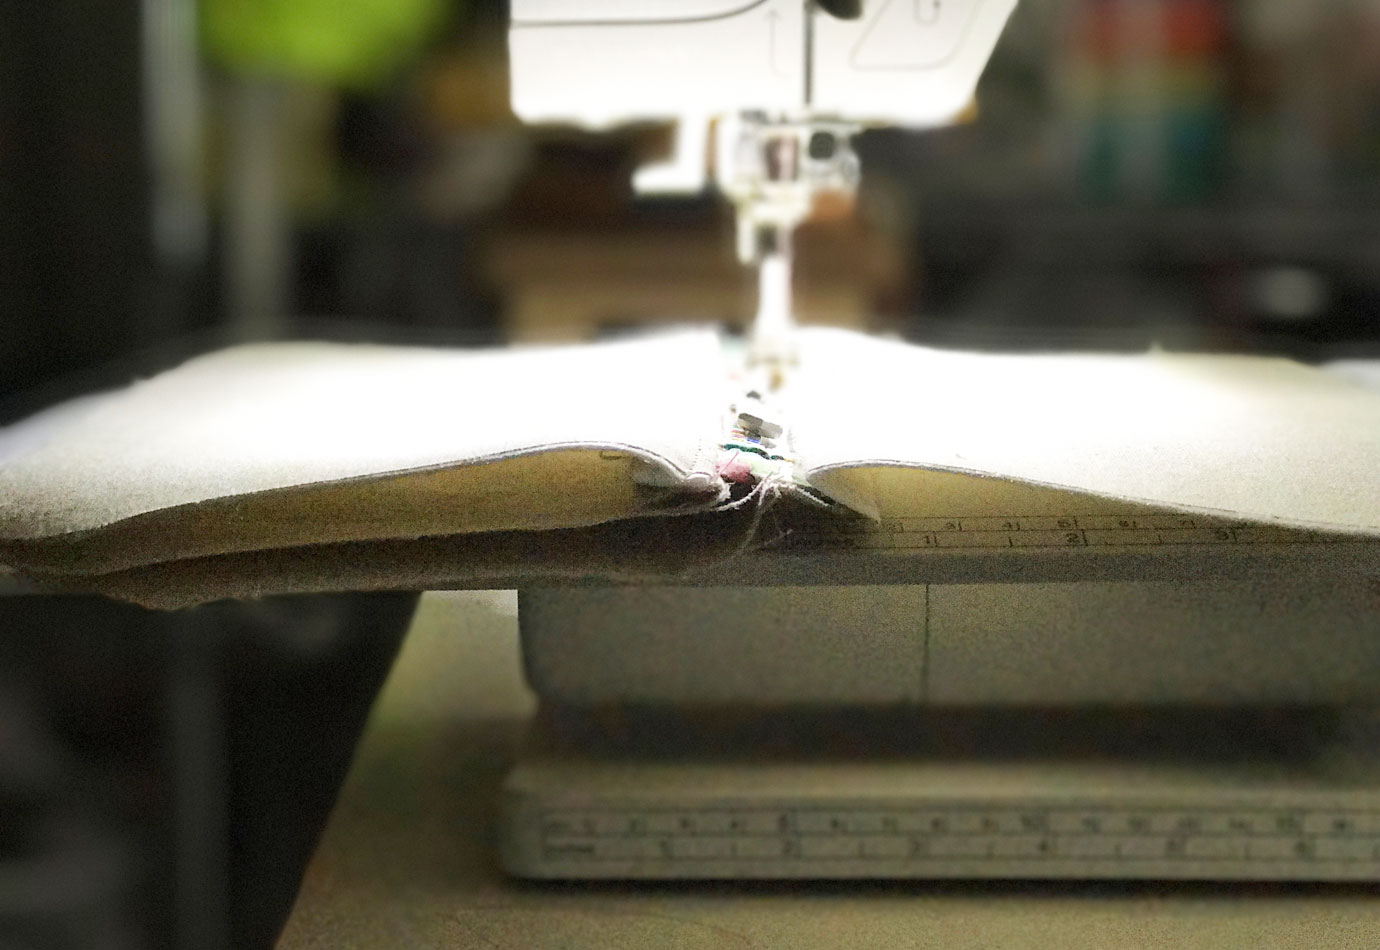
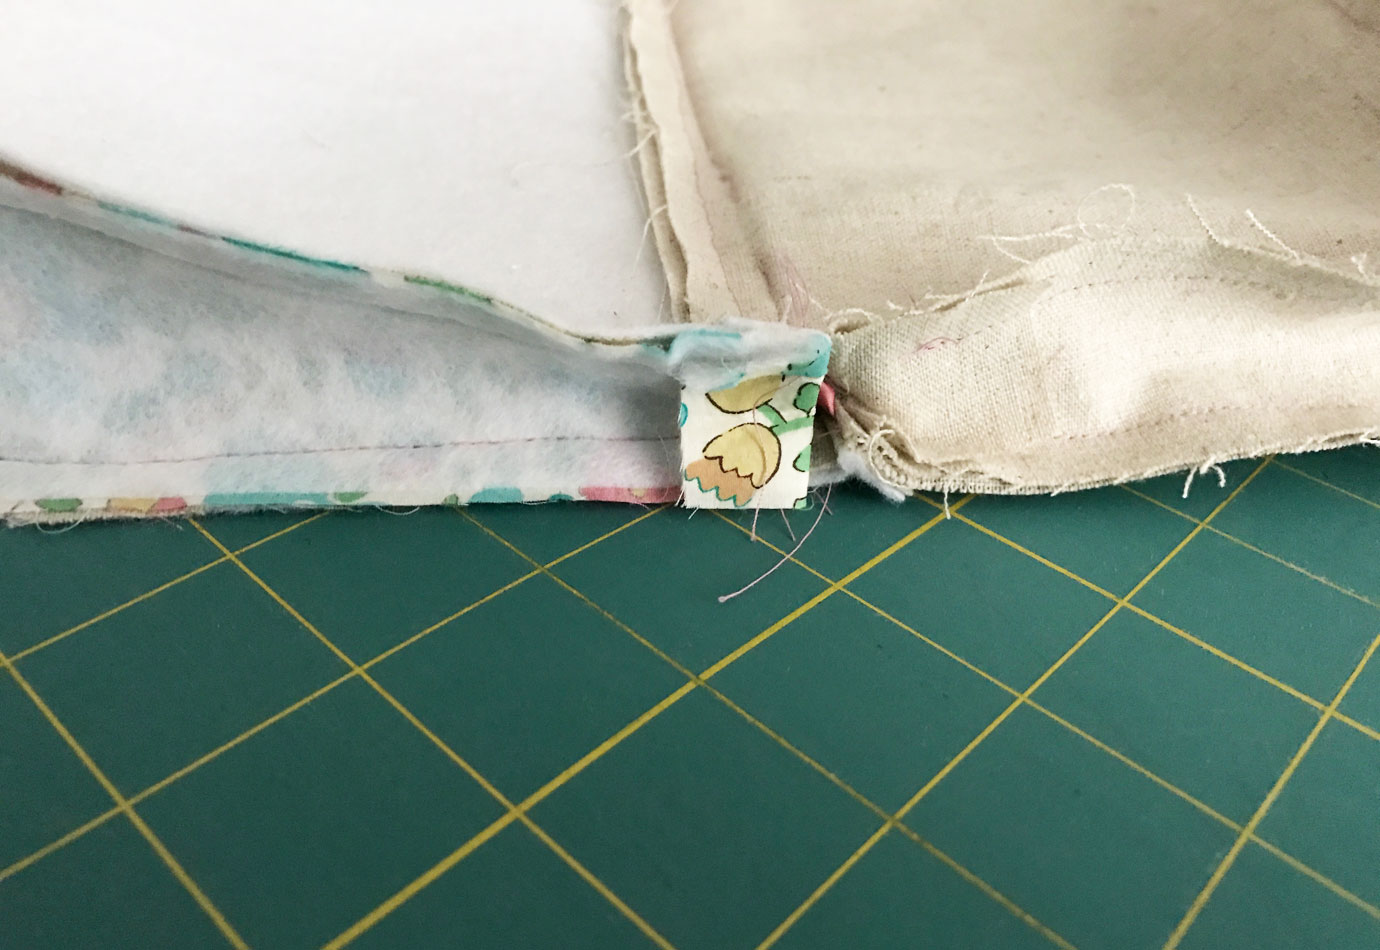
Line up the center folds of the Liberty Accent Fabric Lining piece with the lining. Attach with a 3/8″ seam allowance. I found it easier to add a few pleats when sewing around the corners. You will have about 3/4-1″ extra fabric at the ends of “Liberty Accent Fabric” piece. The excess should be folded down as close to the edge of the zipper teeth as possible.
Repeat with other side. It will look like this when the lining is completely assembled.
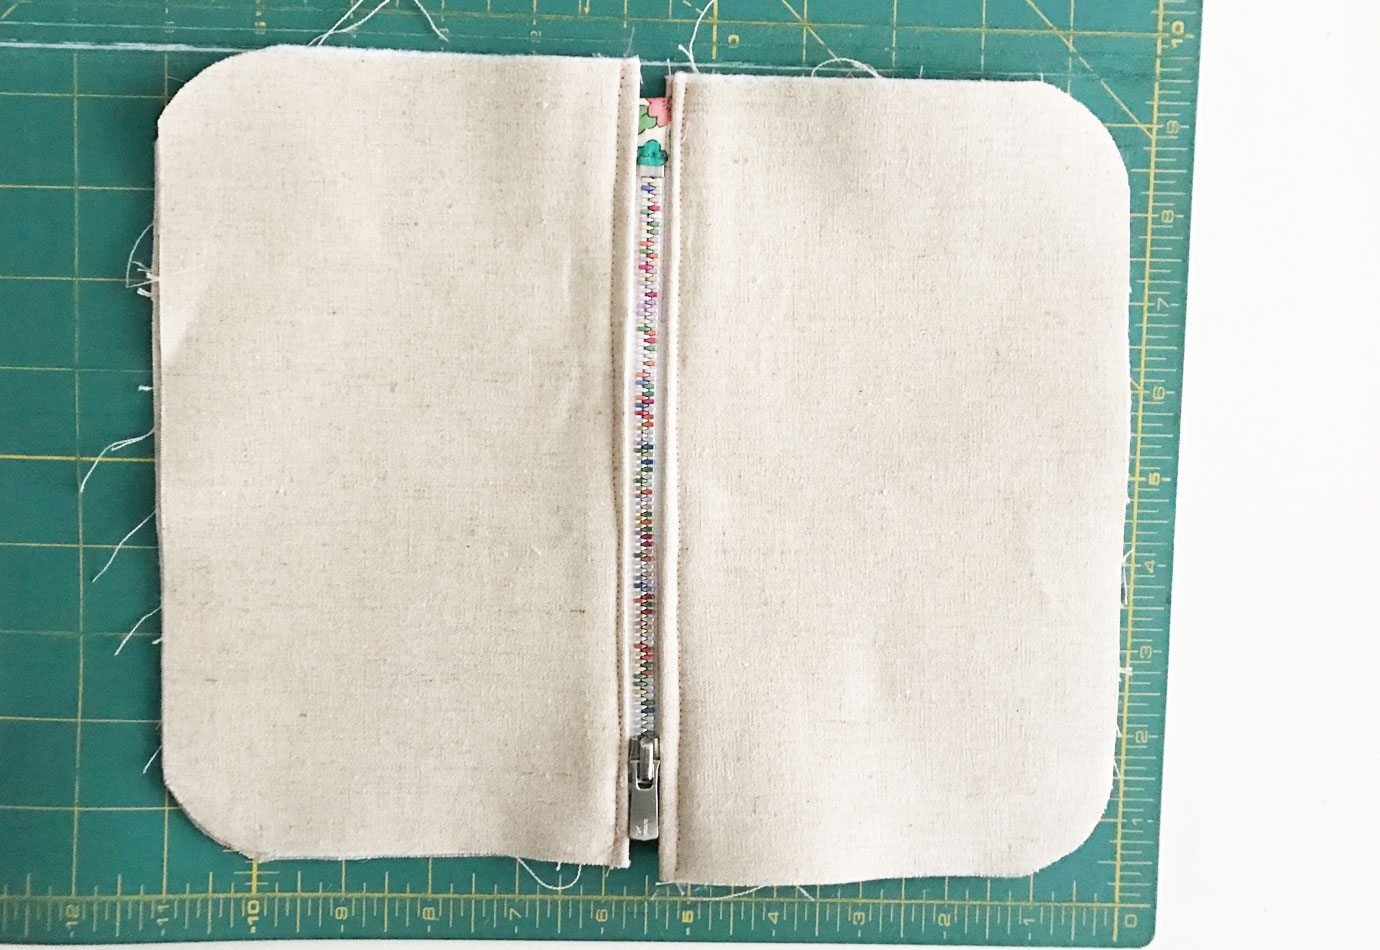
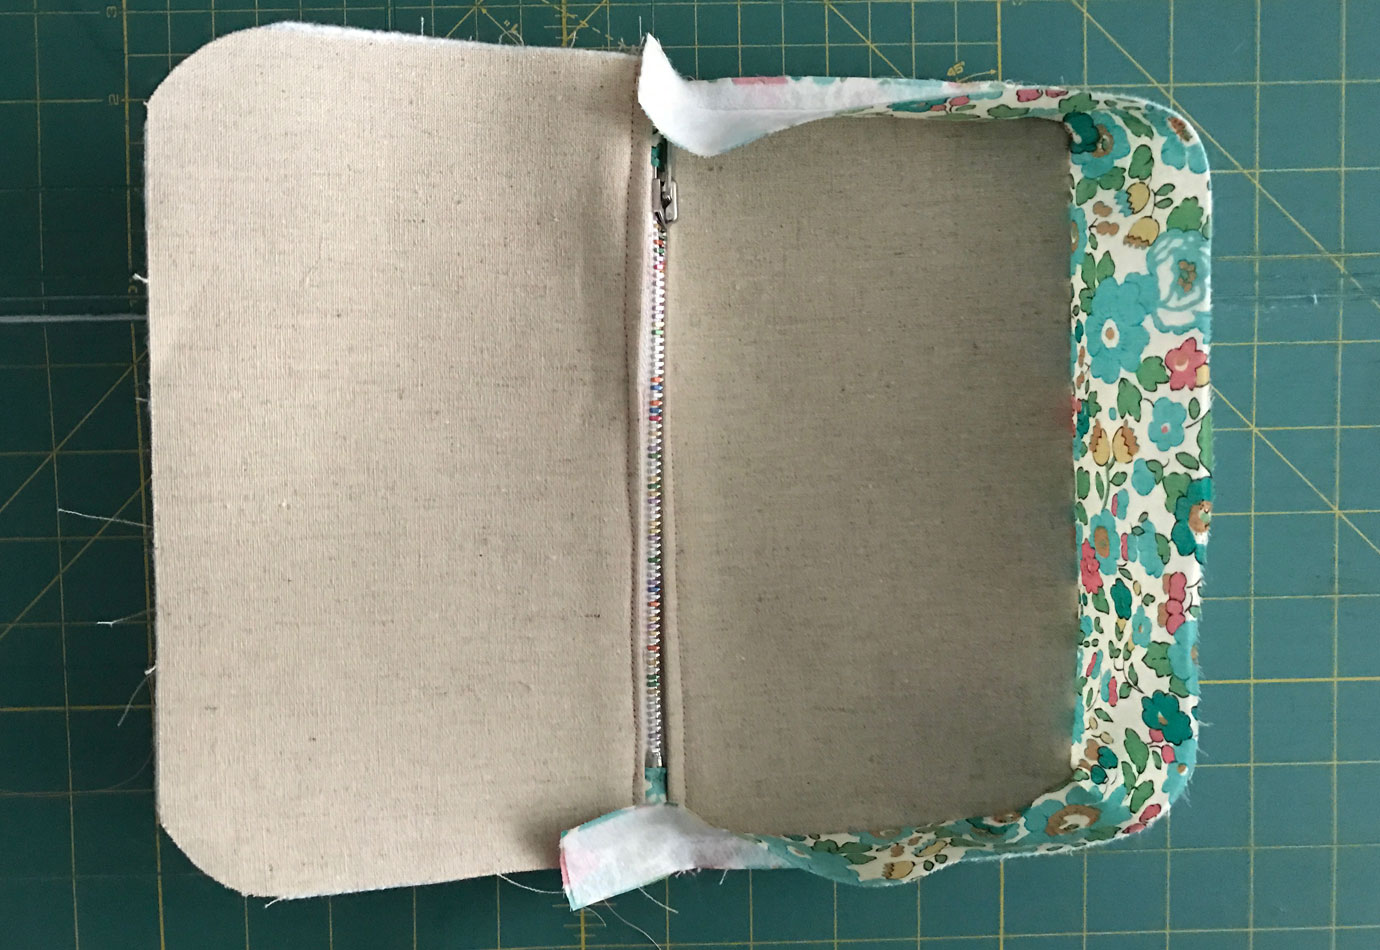
Then, using the same technique, attach the Liberty Accent Fabric piece cut from Tana Lawn to the Body of the bag. Again, you will have 3/4-1″ extra fabric at the ends, which should be folded down as close to the edge of the zipper teeth as possible.
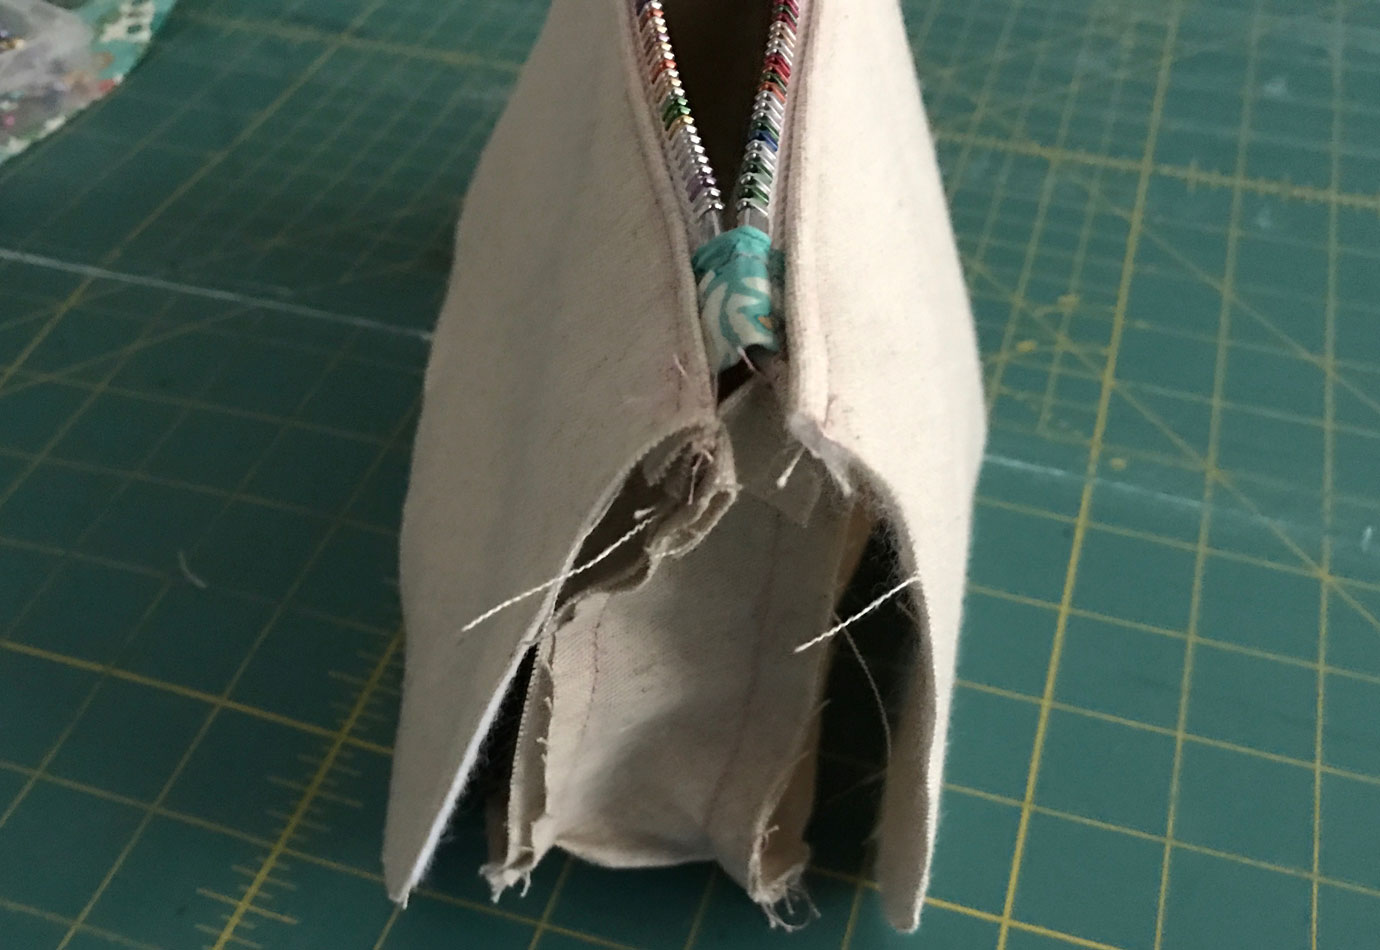
Before you sew the second and last edge, make sure the zipper is completely open. Then, sew leaving 4″ gap at the bottom of the pouch.
Reach in with your hand, flip the bag around.
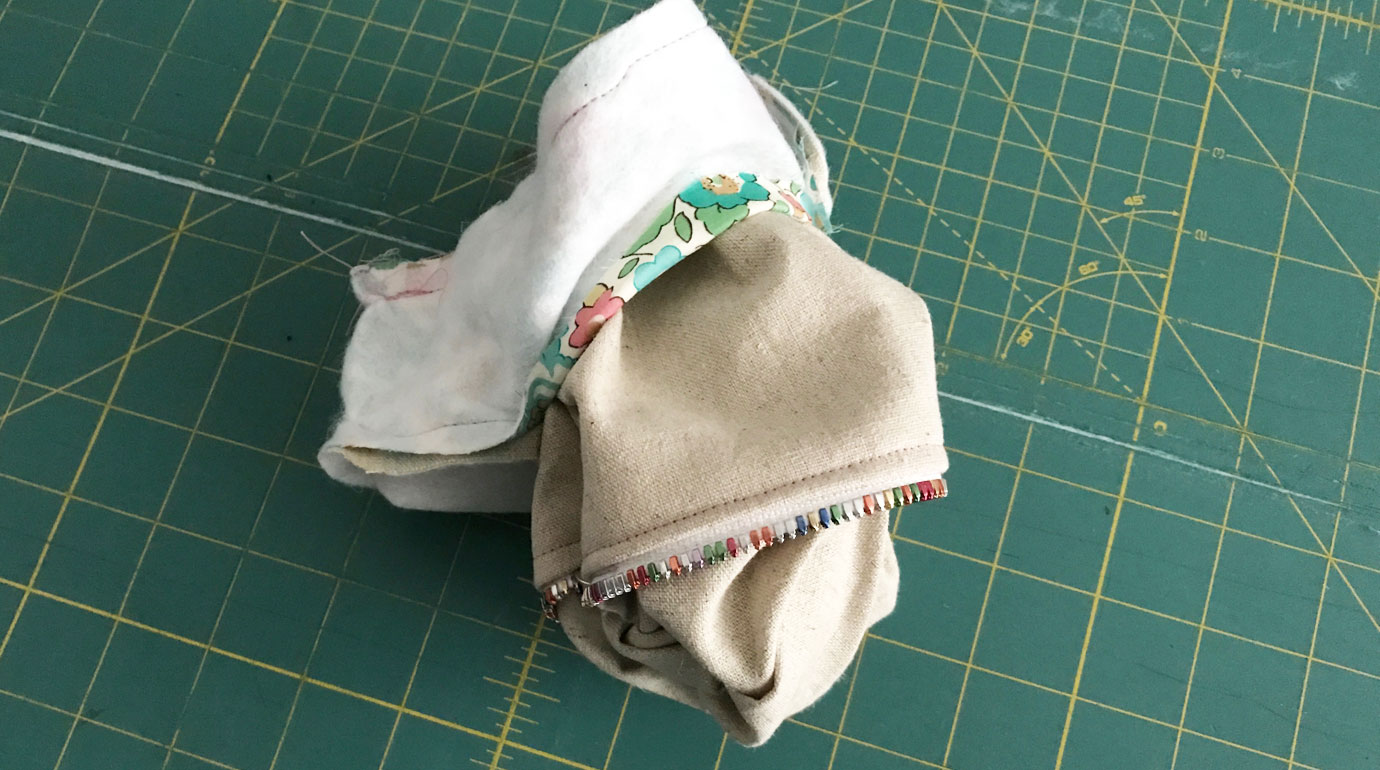
Finally, sew the gap shut with an invisible ladder stitch. And presto, you are done!
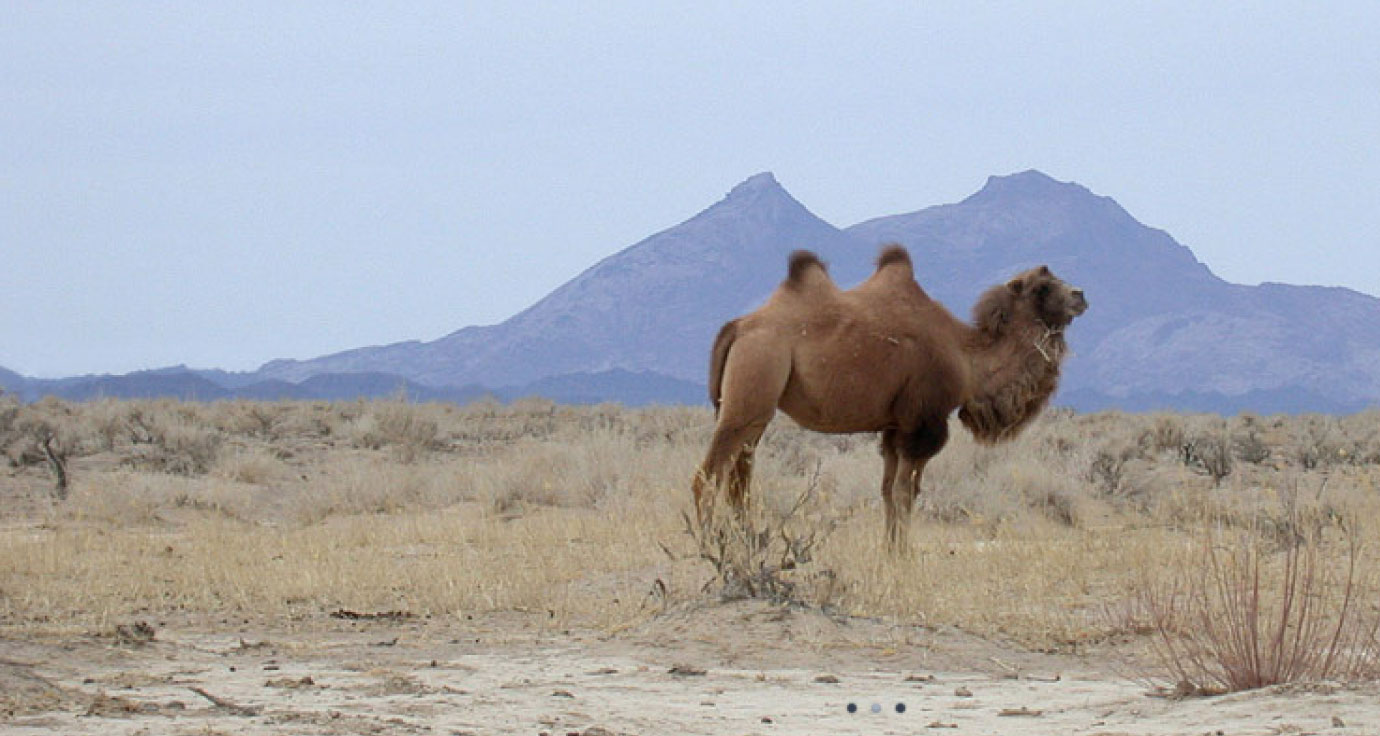
A few months back, we decided to donate a portion of the proceeds from our Clever Camel yarn to support the Wild Camel Protection Foundation (WCPF), a non-profit that’s doing incredible work and which we’re terribly excited to support!
The “sole aim of the Wild Camel Protection Foundation is to protect the critically endangered wild camel (Camelus ferus) and its habitat in the fragile and unique desert ecosystems in the Gobi desert” (located along the western border region of Mongolia and Inner Mongolia). There are an estimated 1,000 wild camels remaining, making them more endangered than the Giant Panda.

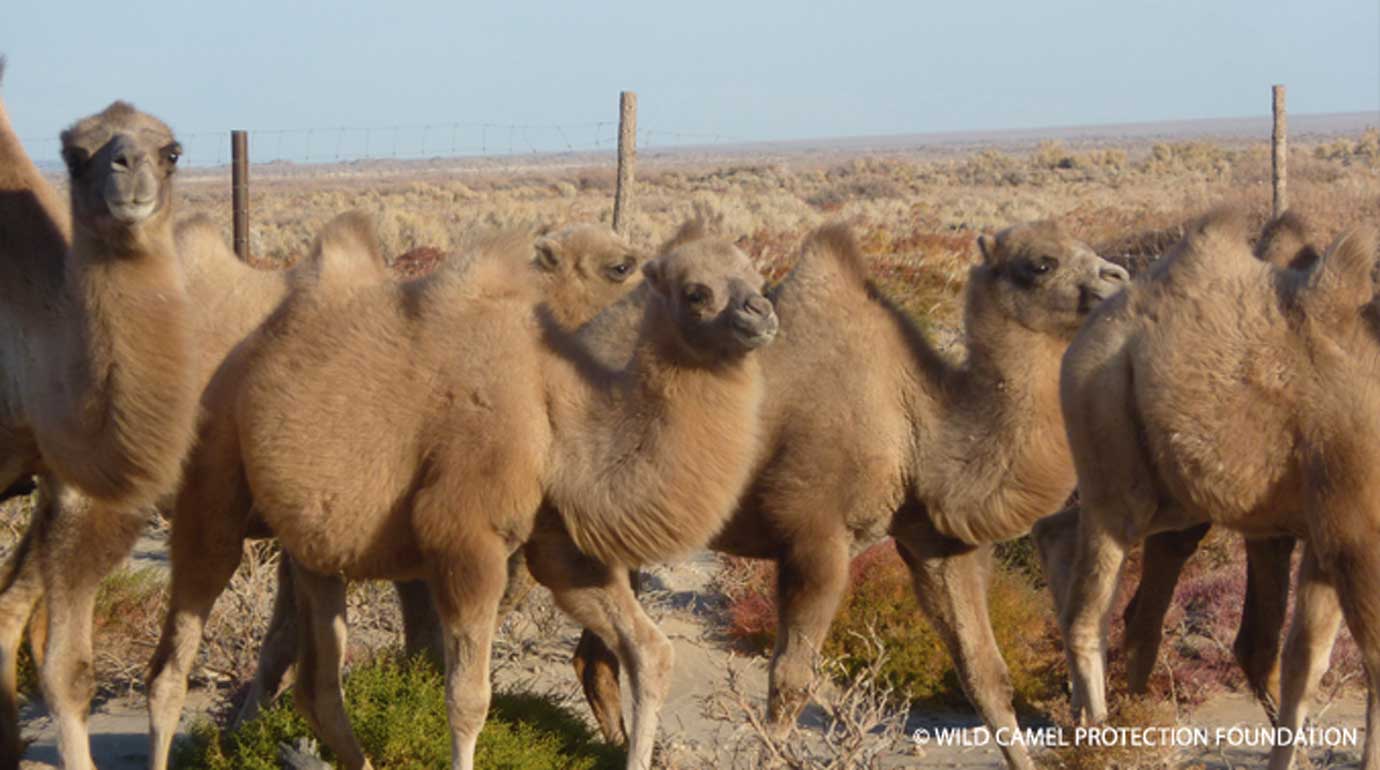
For this year, your purchases of Clever Camel yarn enabled us to contribute to the protection and feeding costs of this cute little fellow born last year (below right). With your help, we hope to continue and expand our support of Wild Camels in the years forward (maybe adding a cousin, sibling to the flock we support!)
Some interesting facts about the Wild Camel (and why you should care about this incredible species):
For more information, visit:
(all photos courtesy of the Wild Camel Protection Foundation)
And last but not least, a happy thanksgiving to all who celebrate it! We are truly grateful for your support, words of encouragement, and kindness.
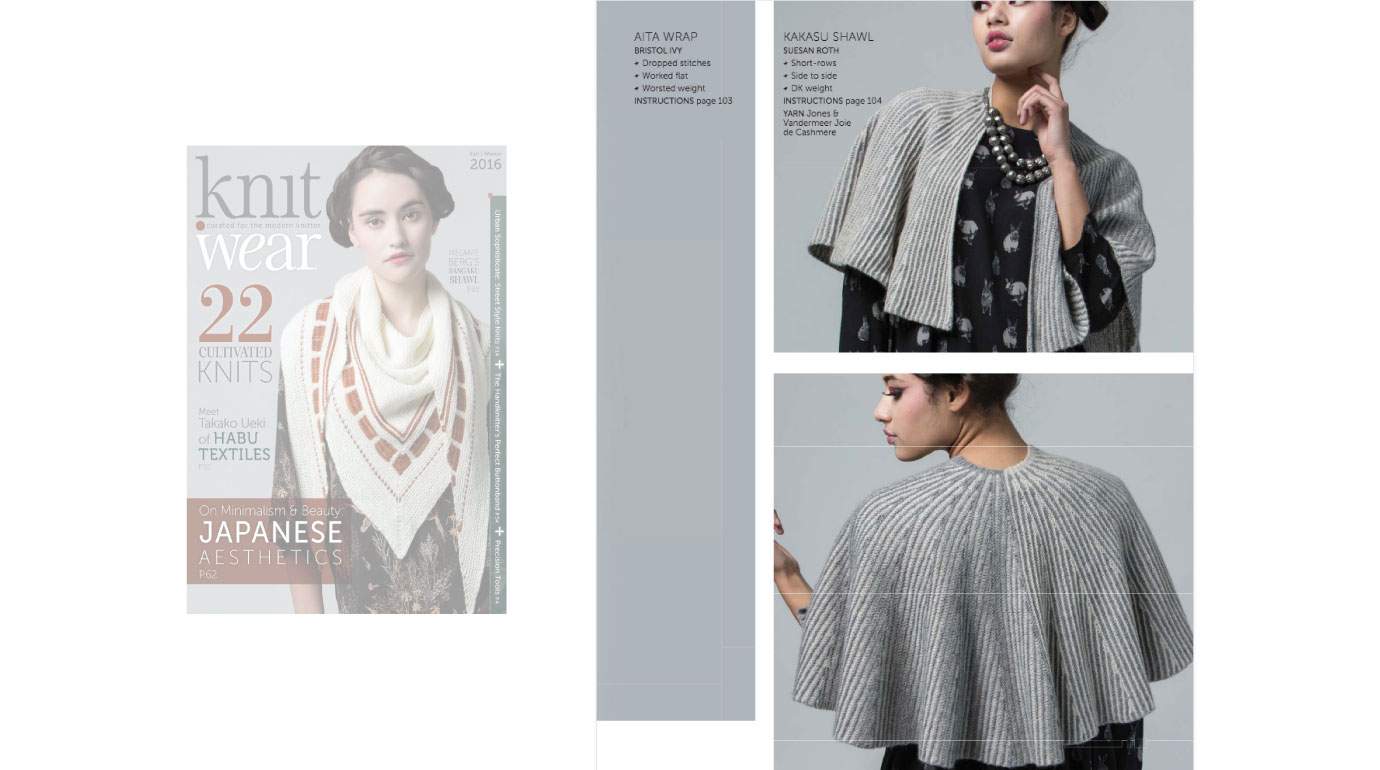 a while back, knit.wear magazine asked us to send them some joie de cashmere yarn for a mystery project. to be honest, we had forgotten all about it until the most recent fall/winter 2016 issue fell into our mailbox . . . and lo and behold . . . on page 71, we found suesan roth’s stunning kakasu shawl knit up in our yarn.
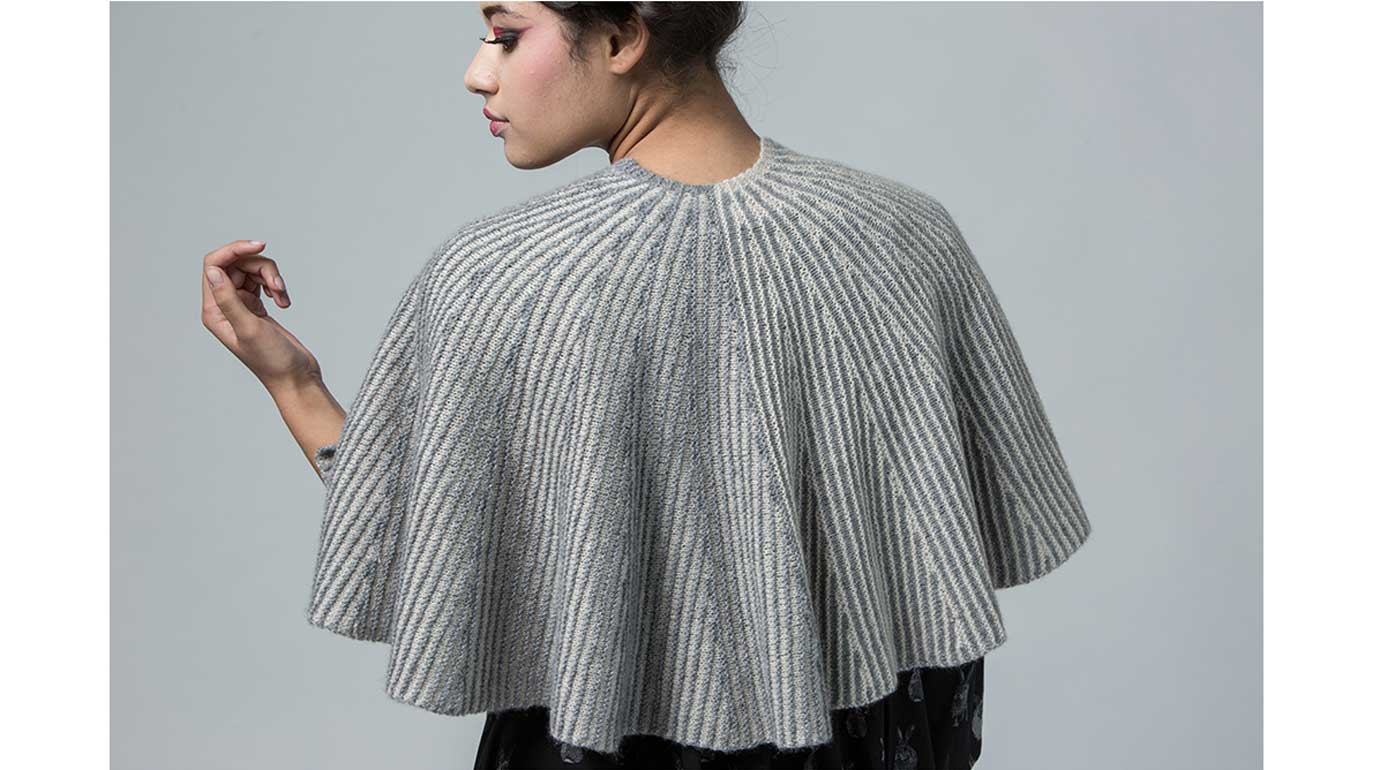
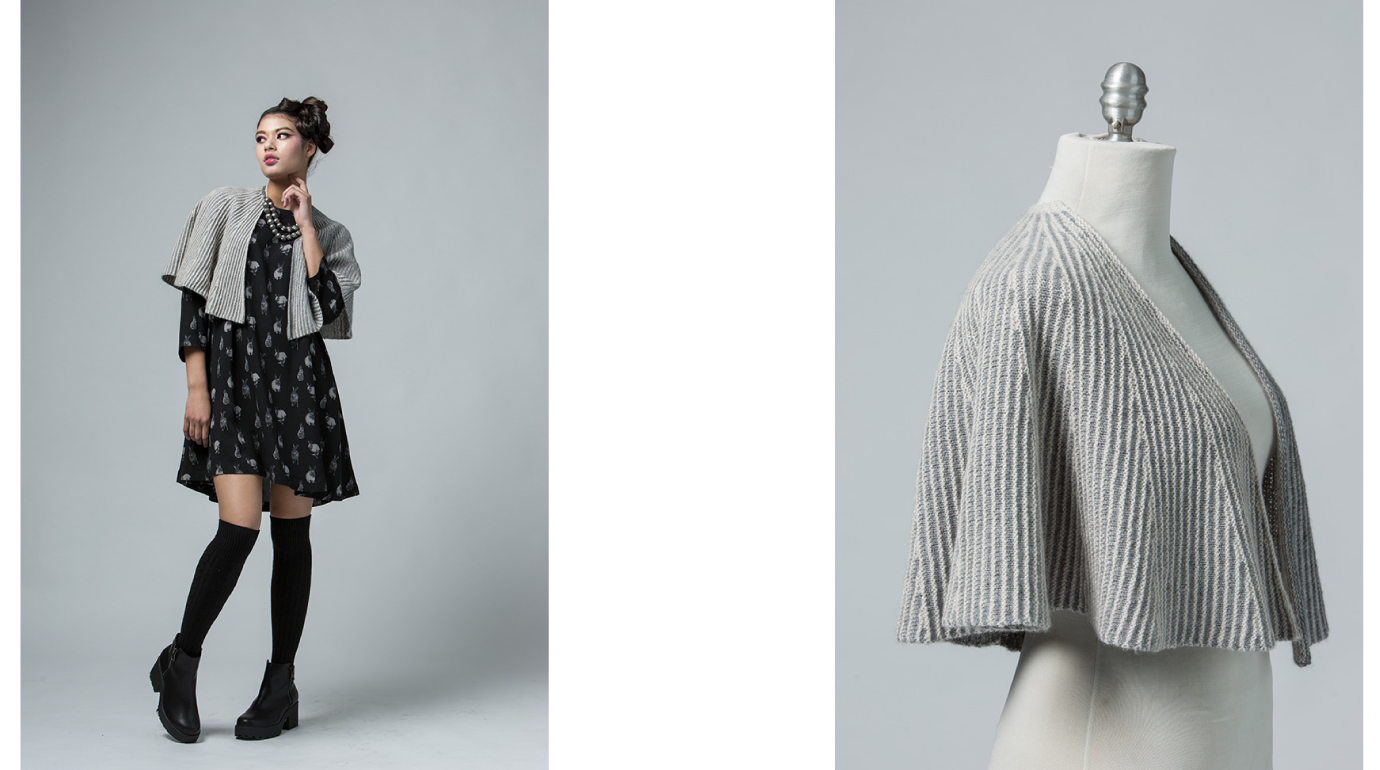
knit.wear was kind enough to send along some larger photos to share with y’all. that said, what the photos don’t capture is the sparkly metallic effect of the yarn. it’s a subtly sparkly and show stopping piece when seen in person!
the pattern is available as part of knit.wear’s fall/winter 2016 issue or to be purchased individually at suesan’s ravelry page here.
 i got bit by the christine haynes lottie pattern bug earlier this summer. . . whipping up a blouse version in double gauze. it was such a comfortable fit that i decided to make a dress version for autumn winter, using nani iro’s fuwari fuwari print in brushed cotton (it’s like a flannel).
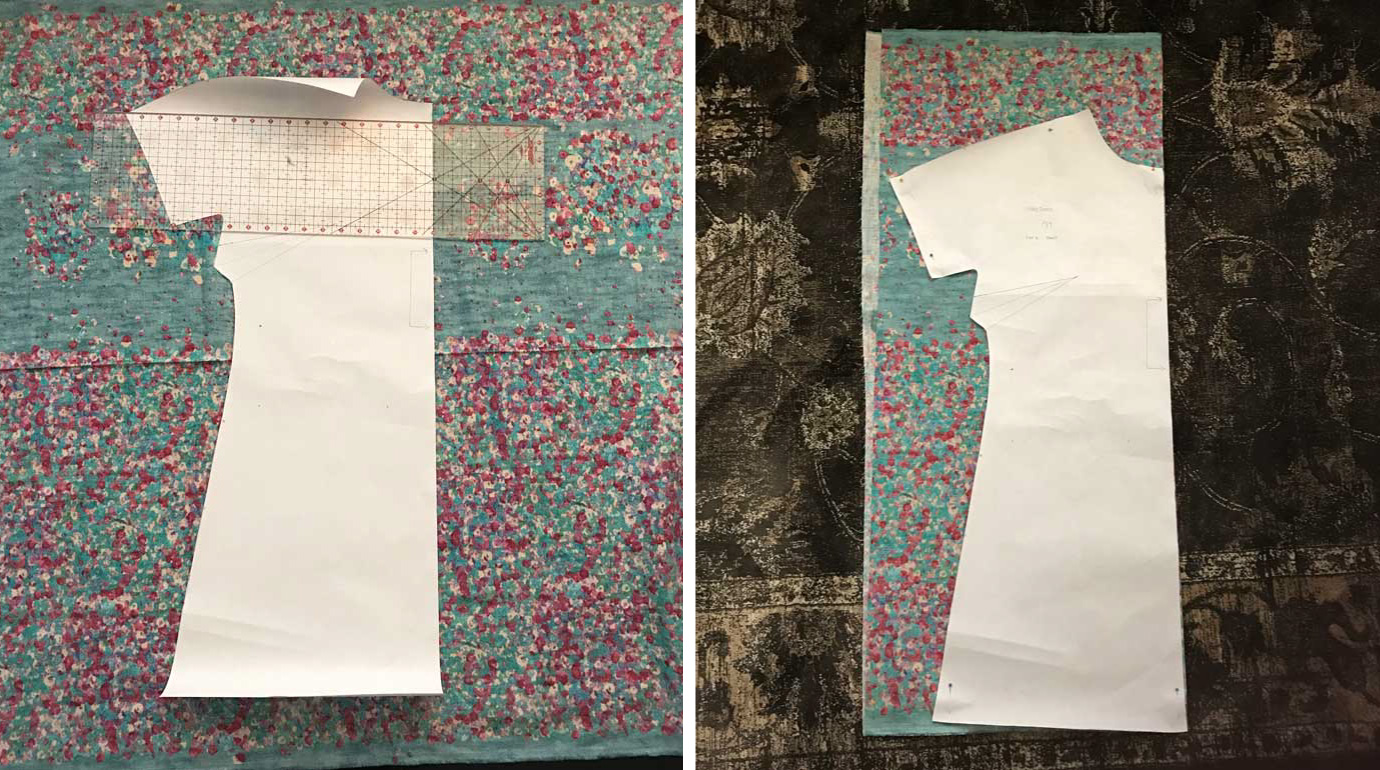 the lottie pattern is a simple design, very well suited for displaying asymmetrical, railroaded border prints like the one i chose. to best show off the print, the cutting layout should be adjusted. the best way to do so is to cut out the pattern pieces and lay them out (on the fabric itself if you have it) or just on the floor so you can measure how long of a piece you will need. i made the lottie dress in a size 6 and used 2 1/4 yards with this modified layout. not shown in the photos, but i made sure to align the bottom edge of each body piece to the bottom selvedge, so that the pattern would be somewhat aligned.
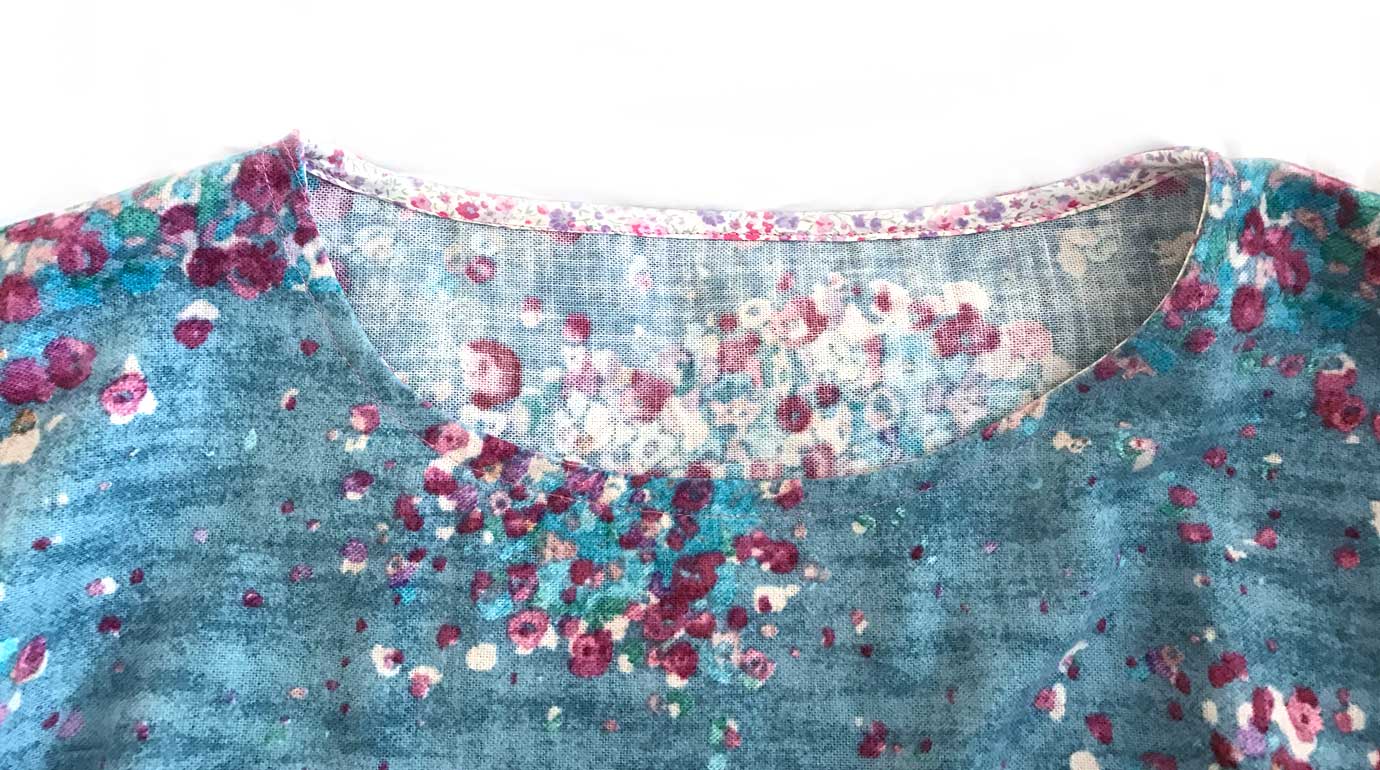 i also finished the neckline using liberty bias binding. brushed cotton is a bit thick and i found it much easier to use a lightweight lawn to finish off the neckline.
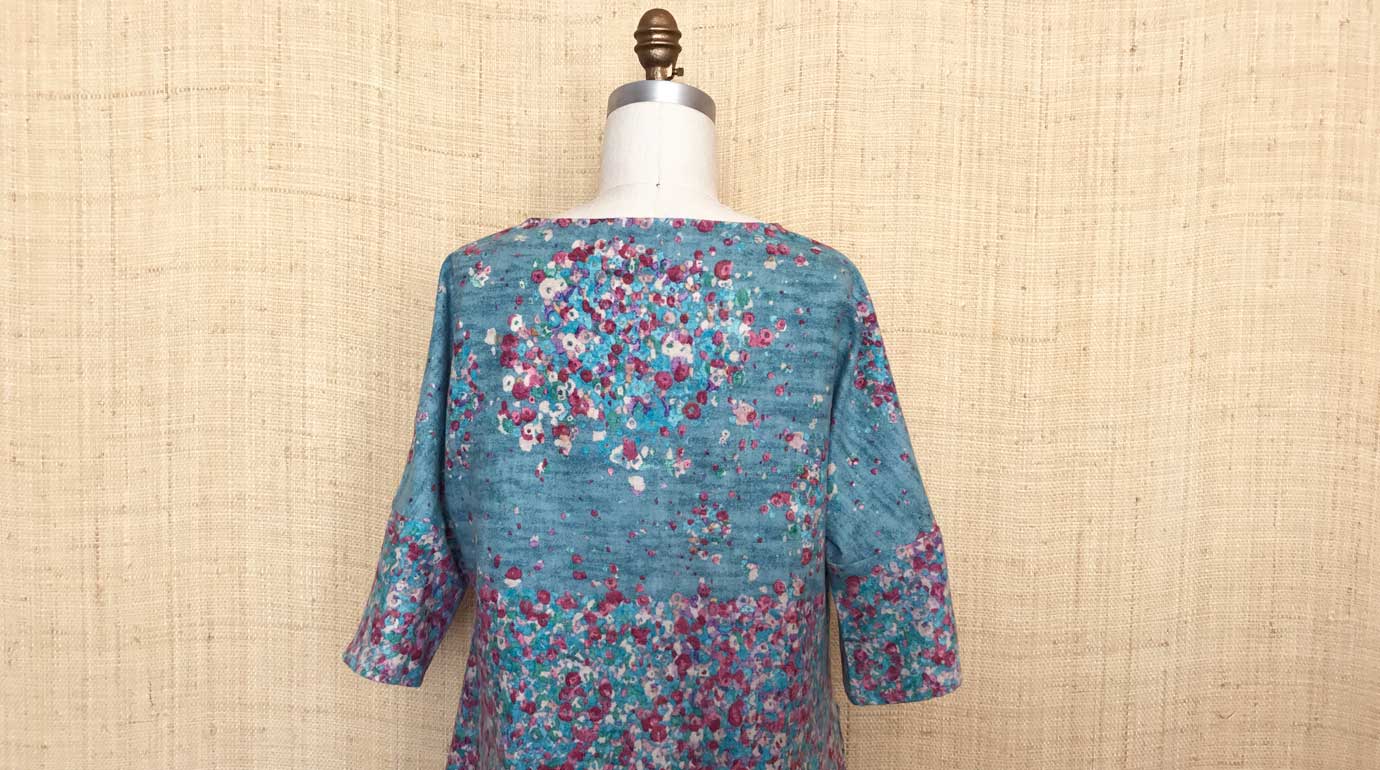
 and there she is from more angles, what do you think?
 when the Kid was first born, he received a beautiful jinbei and a pair of traditional japanese zori sandals (pictured above). the jinbei, he eventually grew out of, but the zori sandals still fit (sort of). i’ve been meaning to replace his now too small jinbei for a while now, and when i stumbled upon dans la lune’s jinbei pattern, i decided it was a must do summer project!
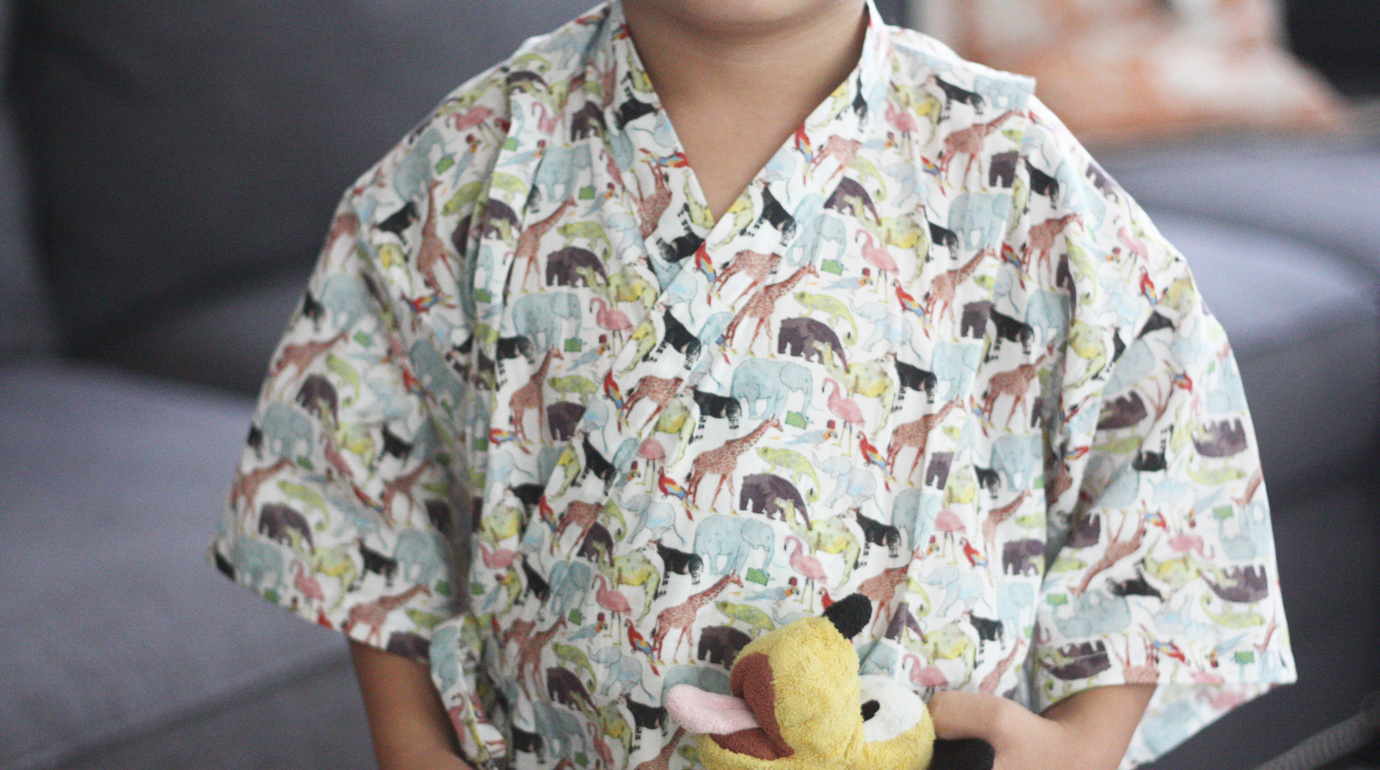 a jinbei can be thought of as traditional japanese loungewear. it’s worn by both adults and children alike, and usually in the warmer summer months. for children, a jinbei makes for great playwear or lightweight pajamas. for adults and older children, the jinbei consists of two pieces. a pair of loose fitting short pants and top. the top, also loose-fitting, is tied on the inside and the outside.
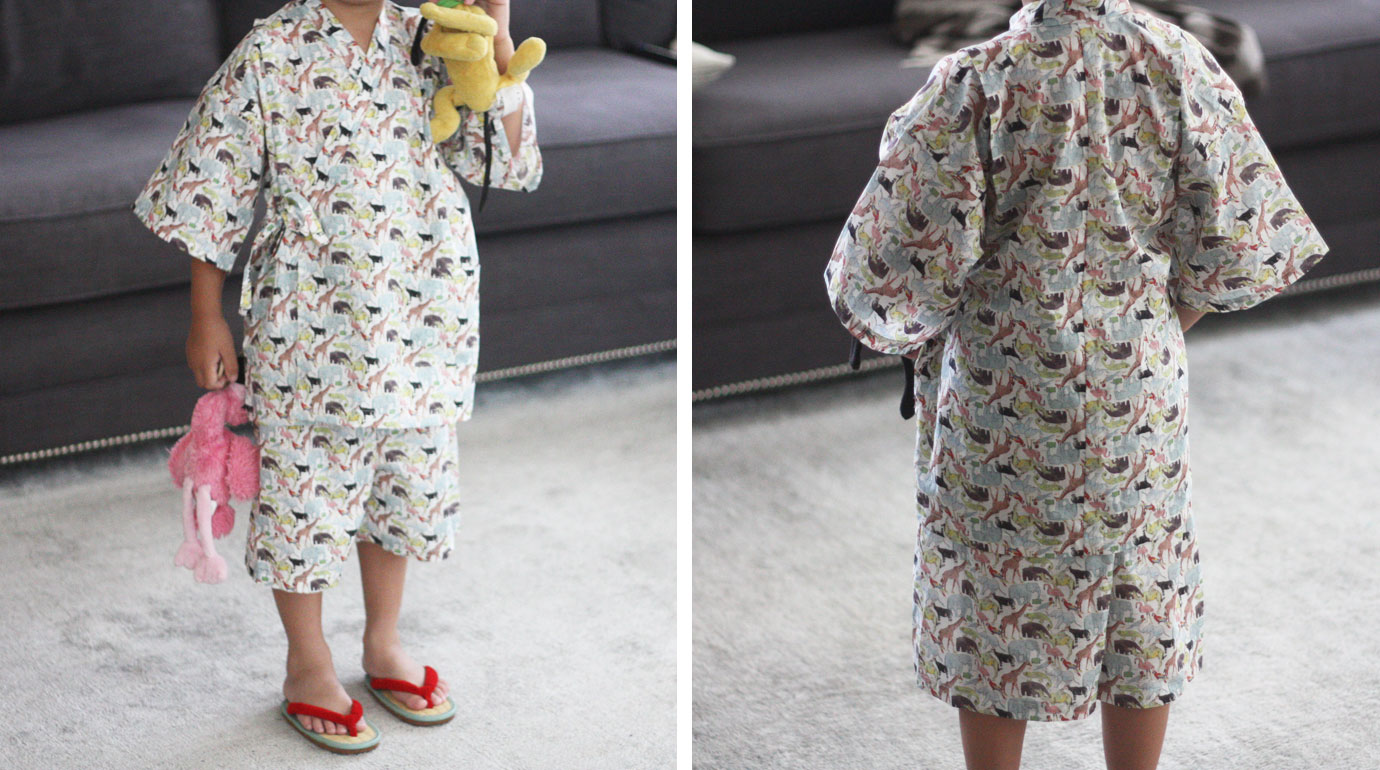
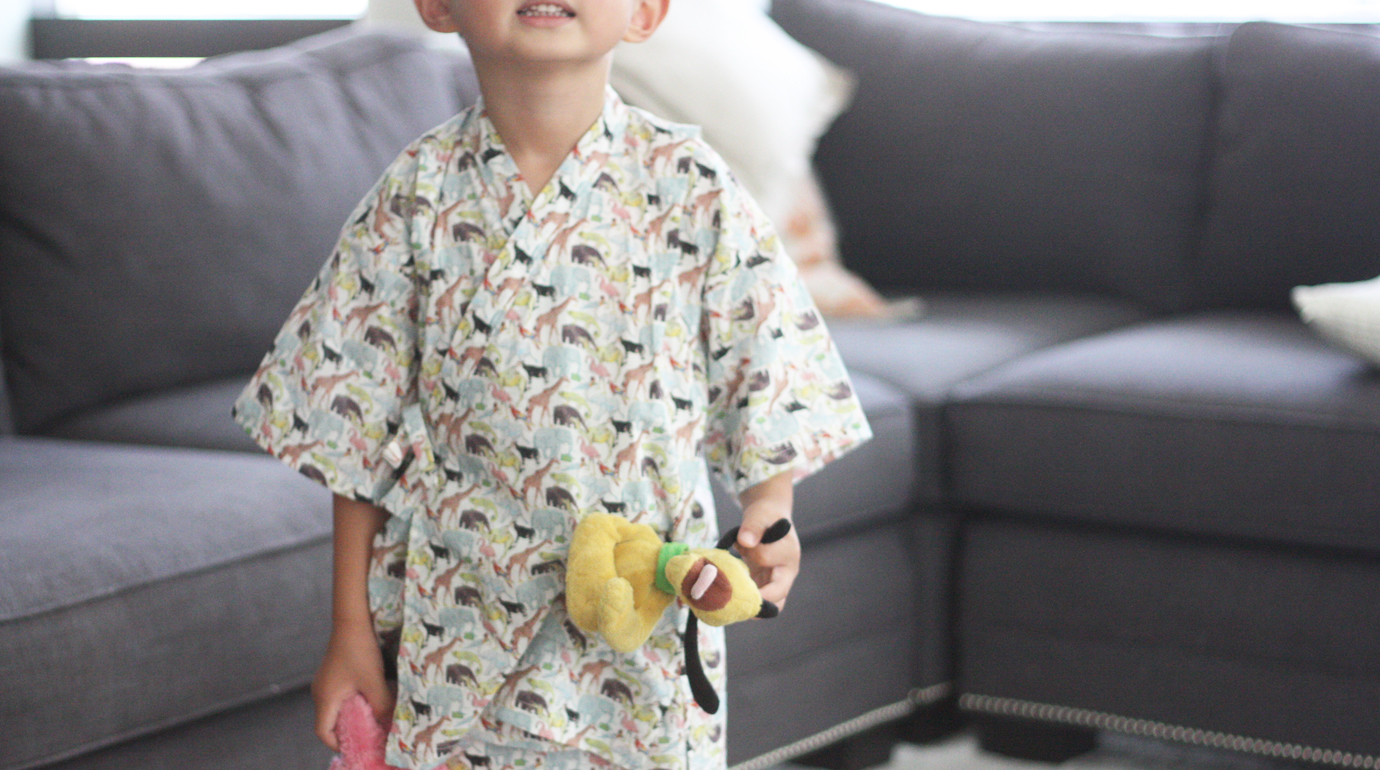
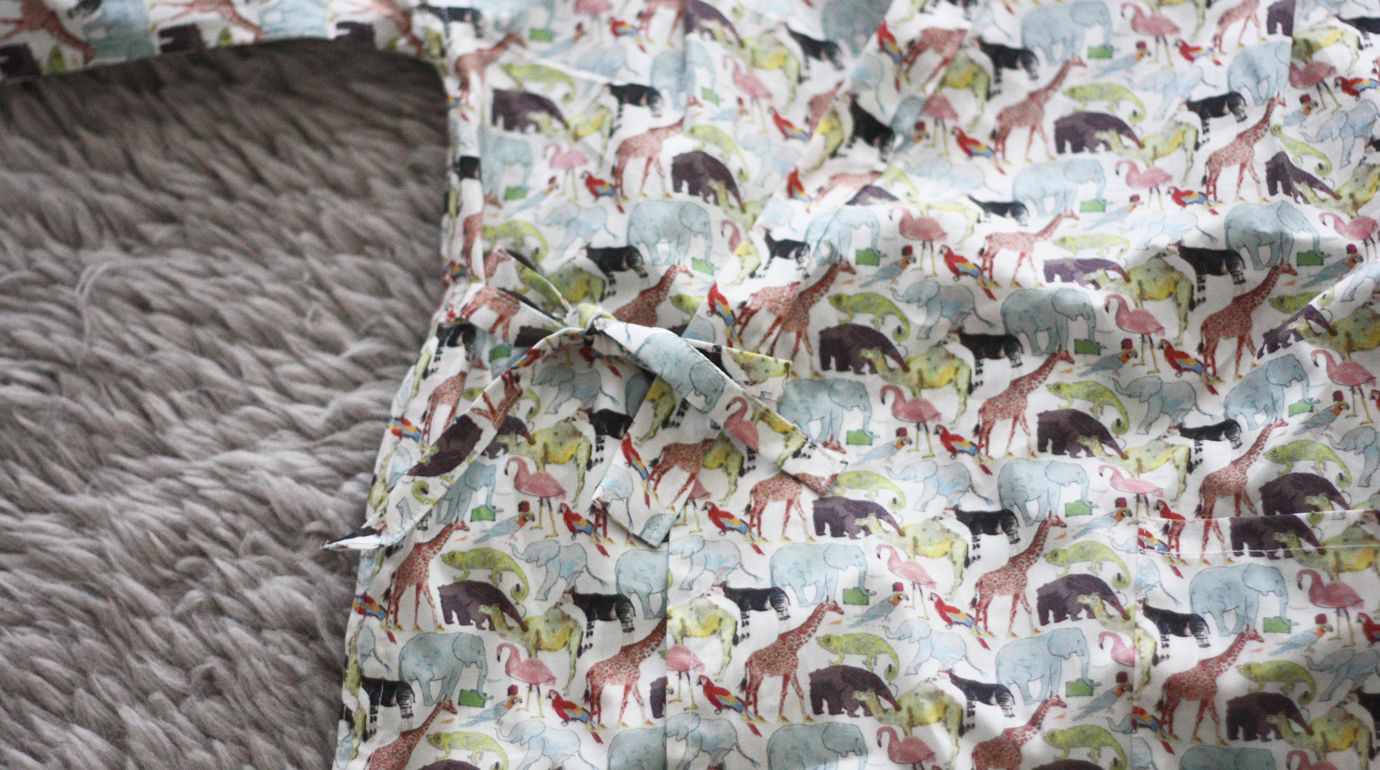 the Kid quite likes his jinbei! no doubt in part because the fabric I chose (Liberty’s Queue for the Zoo) contains flamingos, his favorite bird. he liked it so much, that after our little photo shoot, he decided to wear the outfit to dinner . . . and then he slept in it later at night as well. he also wanted his “friends” to hang-out in it, hence the photo below of pluto stuck in the jinbei‘s front pocket.
 the pattern itself is quite a lot of fun to sew and a good way to learn about all sorts of seams: modified french seams, flat felled seams, clean finish edge, and serged. i found yasuko’s pattern well-written and easy to follow. the only modification i made was to change the serged seam on the sleeve to a french seam, so that all seams on the jinbei would be encased.
i would also note that the pattern is really designed for fabrics that are non-directional, i.e. all over prints or solids. i used a directional print, and if you look very closely at the photos, you’ll notice that the animals are in a different direction on the left sleeve vs the right, and that the animals are running downwards on the back of the jinbei. to use yasuko’s pattern with a directional print, you would have to make a modification to the body piece of the pattern and position the sleeves to be cut as vertical mirror images of each other.
the kid is wearing a size 5 in these photos. he weighs about 40 lbs and is 42.5″ tall.
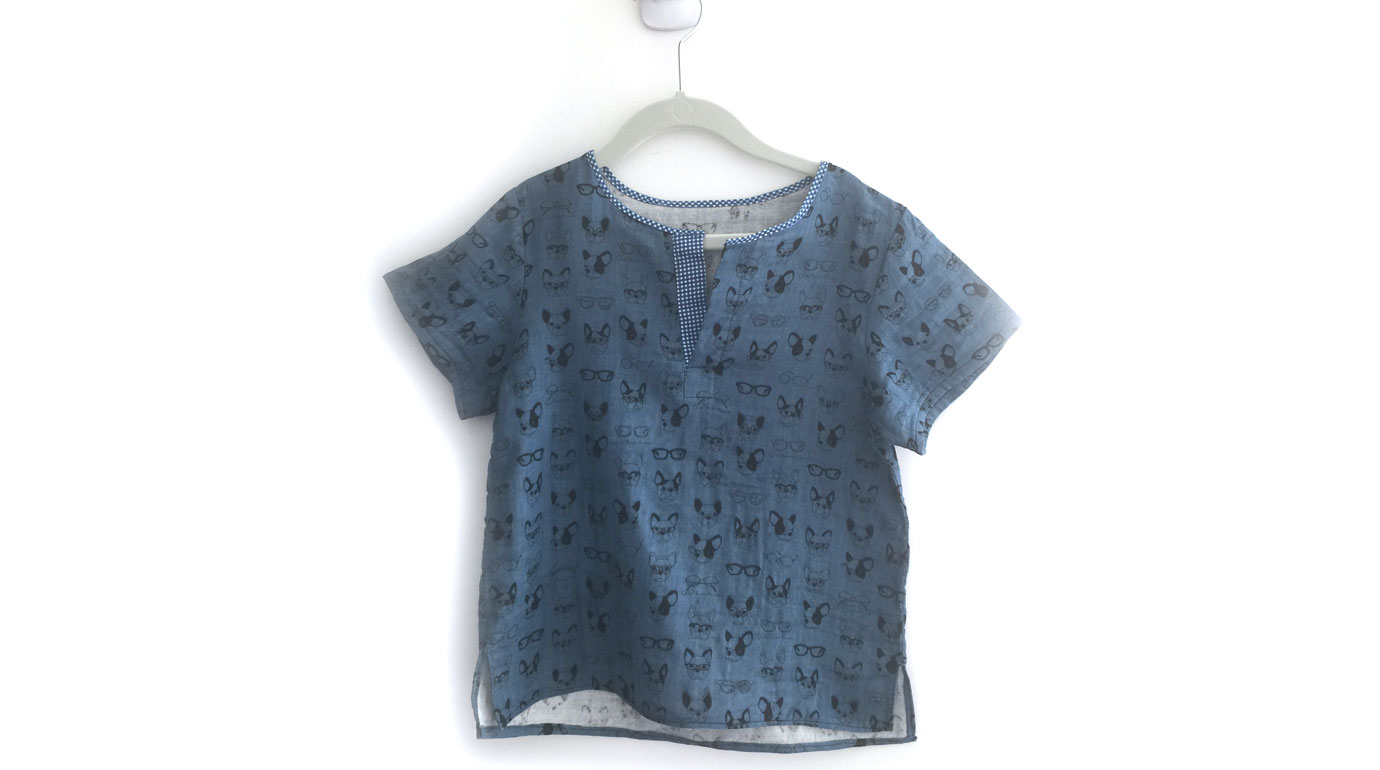 The Kid was in the studio the other day and since I had my sewing machines out, he decided that mom absolutely had to make something for him (it must be nice to have a personal wardrobe maker on command?!). After a quick 15 minute websearch, we stumbled upon Dans La Lune’s Cotton Shirt pattern (she also has an etsy shop). The pattern is designed specially for woven materials, and seemed easy enough to whip up. Sewing with the Kid generally means straightforward, easy designs that don’t require too much fussing around.
 Dans La Lune patterns make things simple. Unlike a lot of U.S. patterns, Dans La Lune patterns are sold by the size (she also offers special pricing for buying 3 sizes of the same pattern) and her patterns show both the sew line as well as the cut line (includes seam allowance) — a practice that is very much appreciated by yours truly, as seeing 16 different sizes all at once on one pattern has somewhat of a miasmic effect on me.
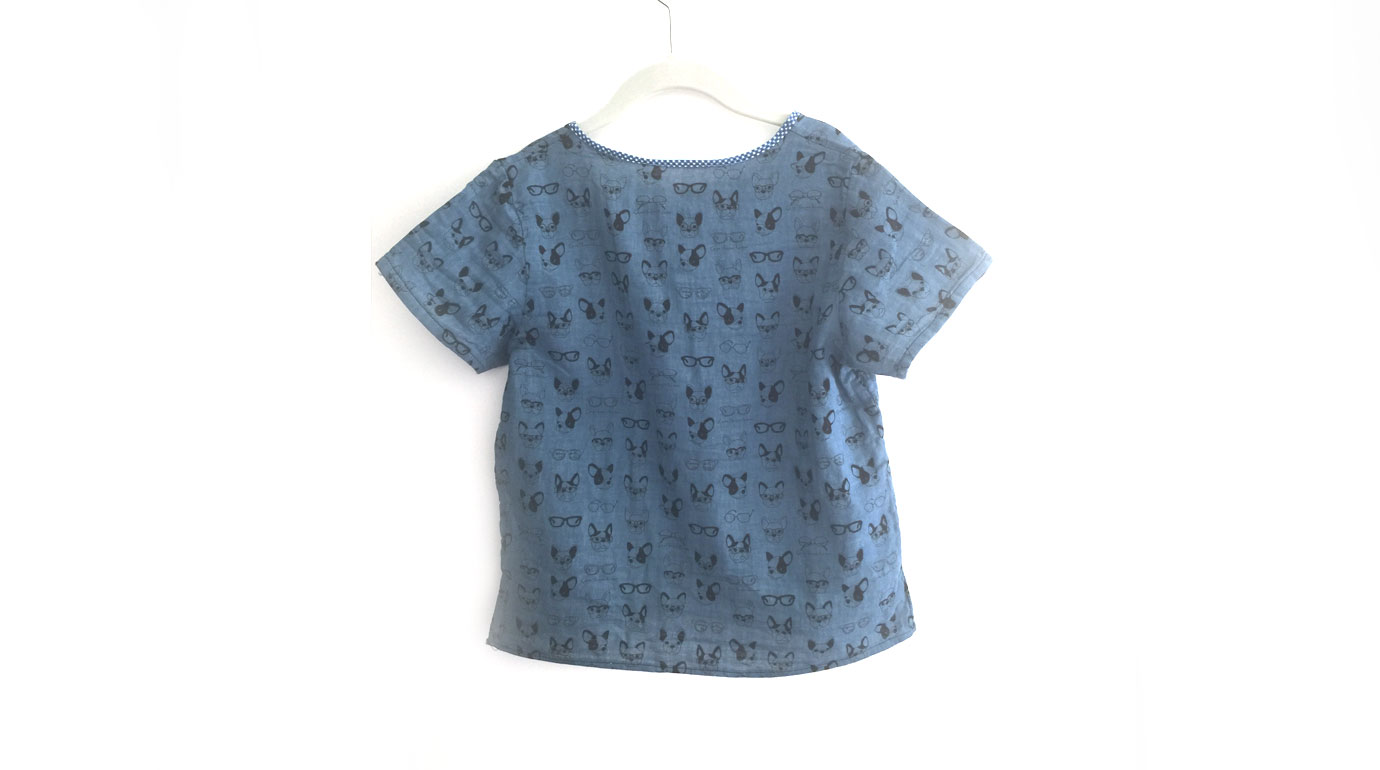 Being unfamiliar, with Yasuko’s patterns, I selected a 6, which is one size larger than what the Kid would typically wear. It’s also the reason why you don’t see the Kid modeling said shirt. It’s just a bit too big on him. Maybe next year. Based on this, I’d say that Dans La Lune patterns are quite true to size — I can tell you more definitively, once I get around to sewing the size 5.
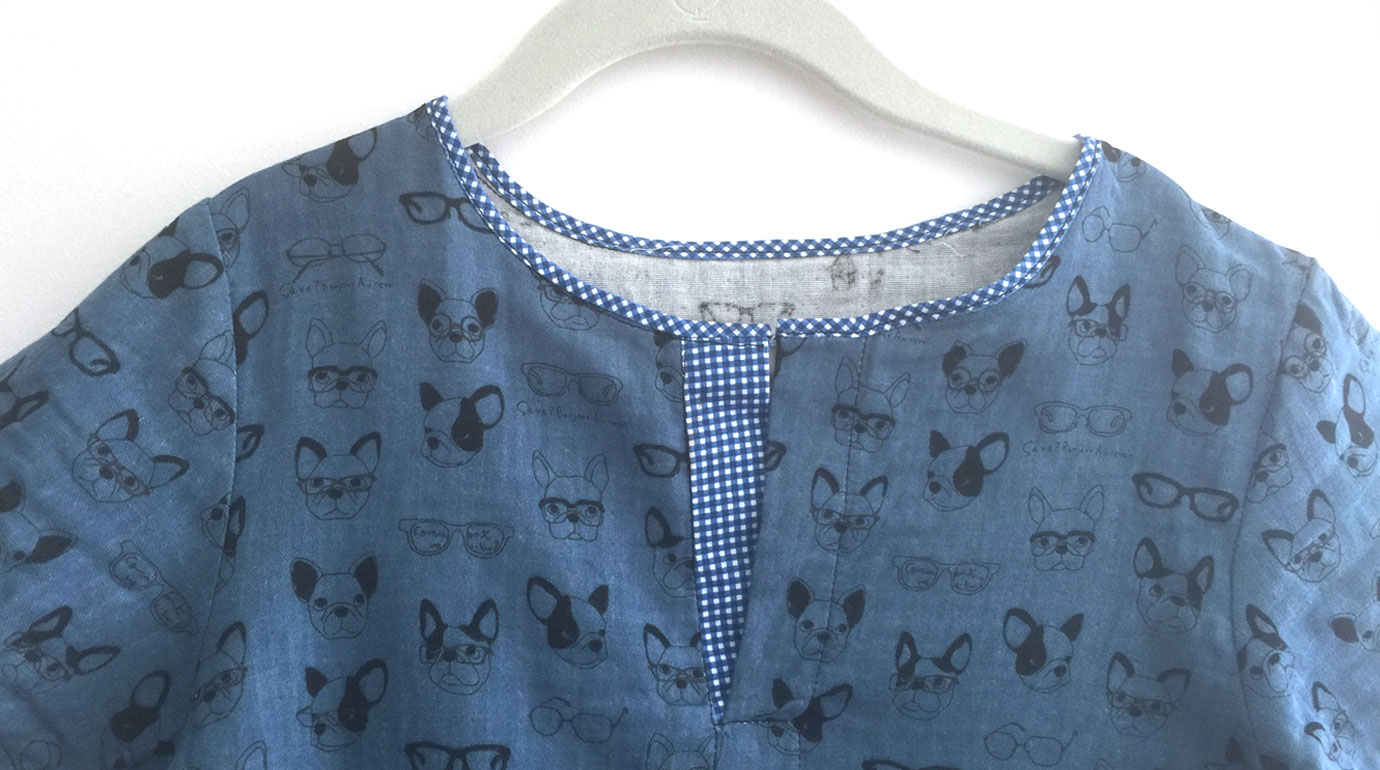
 In general, the pattern is very straightforward to sew, and her instructions are written clearly. As a point of interest, her sleeves feature a European cut, where the back and front of the sleeves have a different slope. More about these type sleeves here.
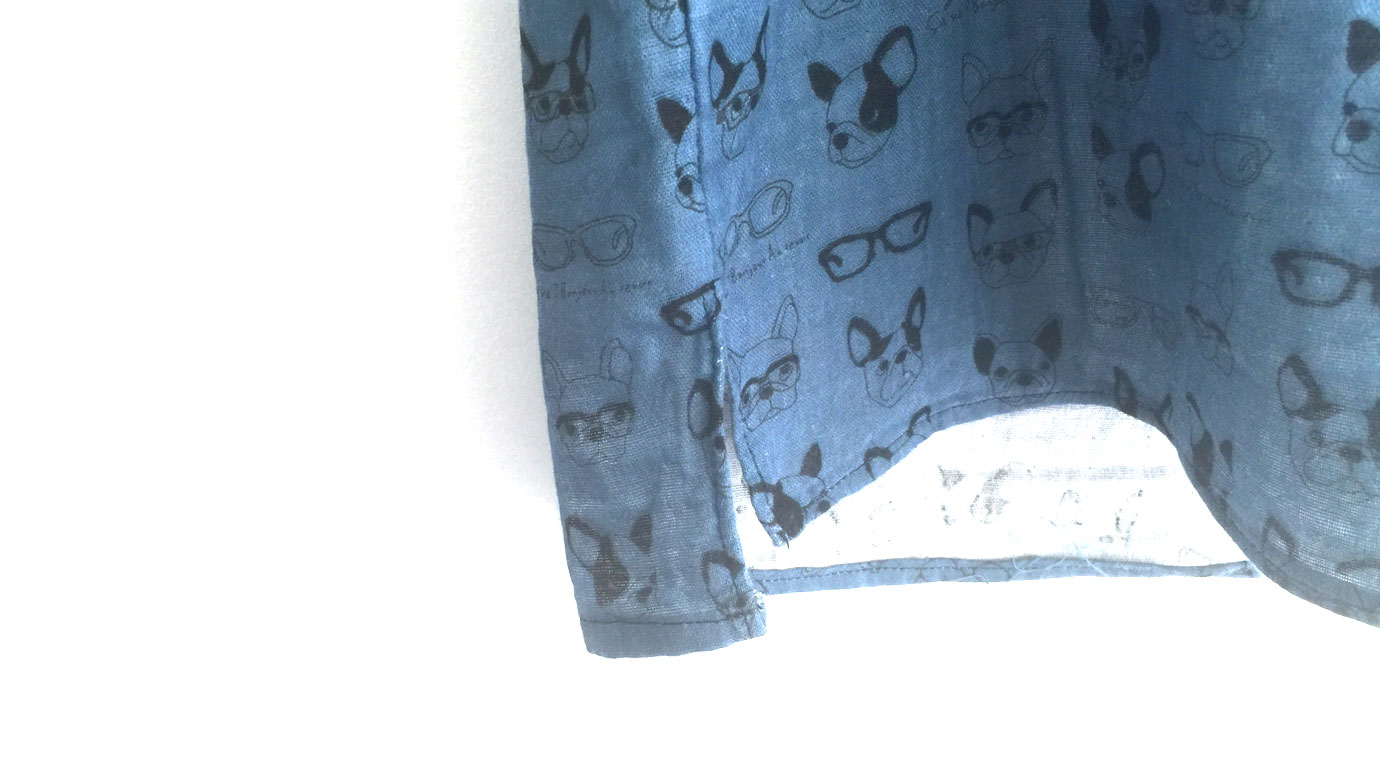
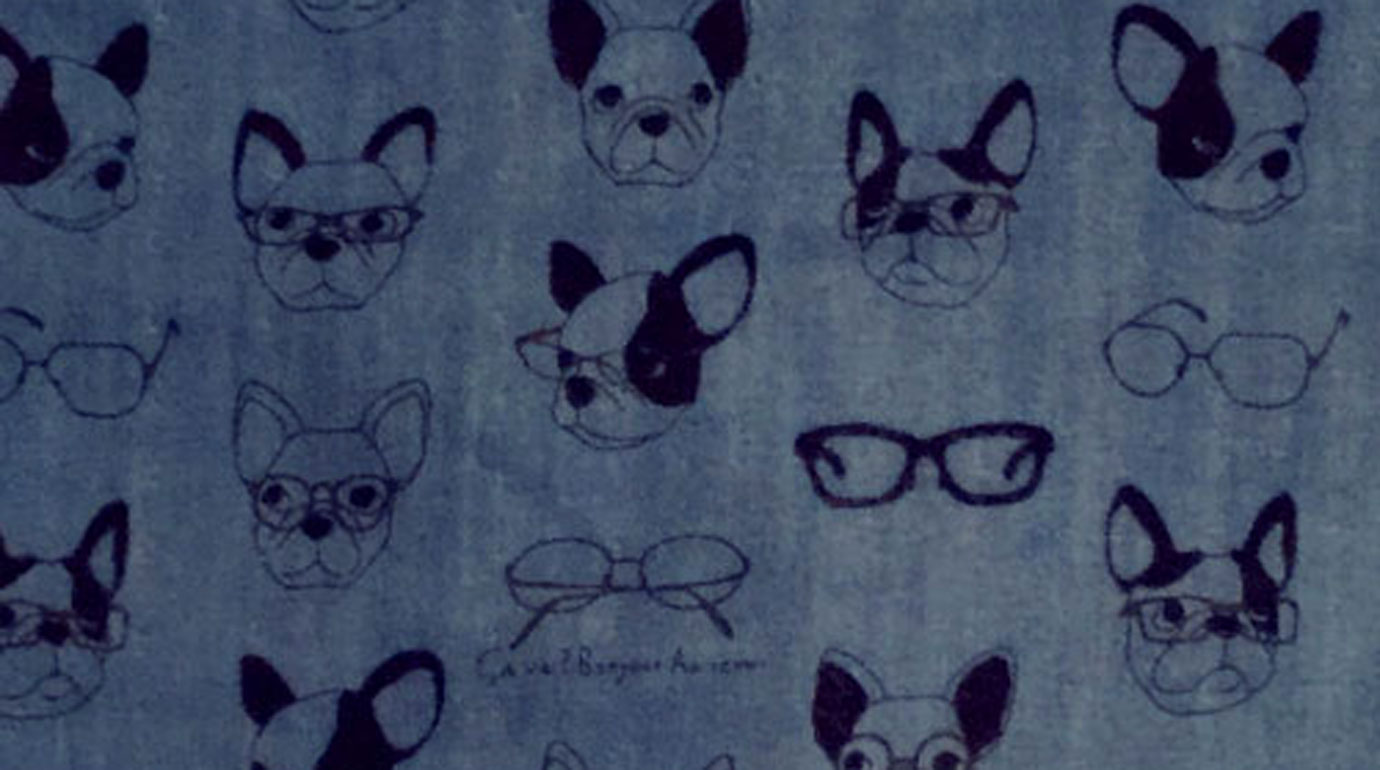 On the fabric front, the Kid is rather fond of double gauze. We selected Kokka’s Boston Terrier design paired with Tiny Gingham (for the trim) in Nite. I also found this water soluble glue pen quite handy — it held the two layers of double gauze fabric together in some tricky parts better than pins. With some supervision from the Kid, I was able to sew the pattern together in under an hour (after all the pieces had been cut).
Next on the docket, I’ve got her Jinbei pattern all cut and ready to sew . . .