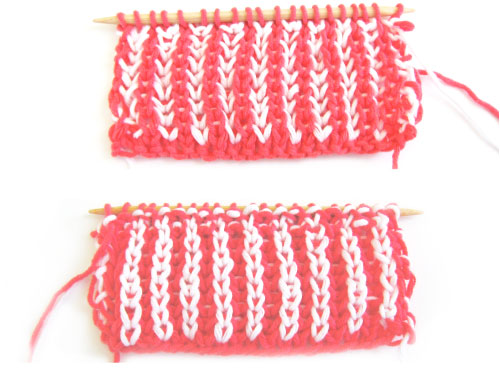
2 color shaker stitch knit flat is a bit tricky, so we’re providing a step-by-step tutorial to show you how we do it.
ABBREVIATIONS
TUTORIAL
With C1, CO 20 sts on either dpns or a circular needle.
R0: With C1, K20 [turn]
It will look something like the picture below when you have turned the piece:
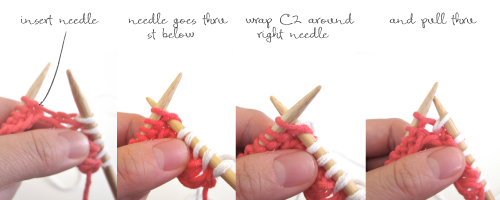
 R1: With C2, *K1, K1B, repeat from * to end [do not turn, slide sts to right side]
The K1B looks something like this (and yes, you’re knitting into something that looks like a purl)

Finished R1 looks something like the picture below. Remember not to turn the piece. Rather, you will pick up the C1 yarn on the right hand side to begin purling in R2.
 R2: With C1, *P1B, P1, repeat from * to end [turn, both yarns are on the same side]
You’re now going to purl into stitches that look like knits (see R3 below for detailed view of P1B). When you’re done with R2, it will look like the picture below (prior to turning).
Once you’ve turned the piece to begin R3, it will look something like the photo below:
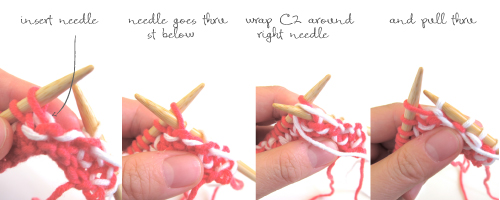
 R3: With C2, *P1B, P1, repeat from * to end [do not turn, slide sts to right side]
You will be purling into stitches that look like knits with C2. Here’s what a P1B looks like:
 R4: With C1, *K1, K1B, repeat from * to end [turn, both yarns are on the same side]
R4 completed looks like this:
 Repeat rows 1-4 for the pattern


2 thoughts on “tutorial: shaker stitch in 2 colors, knit flat”