 a reader wrote in a while back asking for clarification on a stitch sequence used in the elise pattern. it goes something like this “. . . purl 1 through the back loop, drop the next stitch, yarn back, purl 1 through the back loop. . .” there are two parts to this stitch pattern that make it a bit less standard. we’re going to break it down here to explain how the stitch sequence is done:
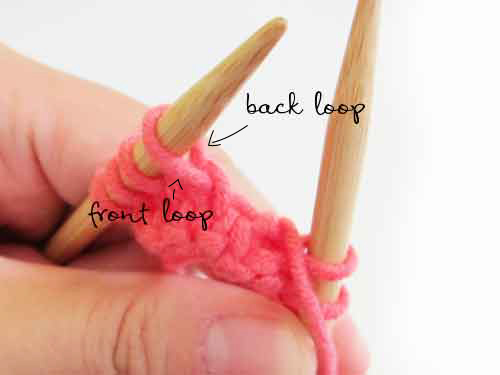
(1) purl 1 through the back loop: this stitch is sometimes abbreviated as p1b or p1-b (not to be confused with “purl 1 below” which sometimes has the same abbreviation). a stitch has a front loop and a back loop.
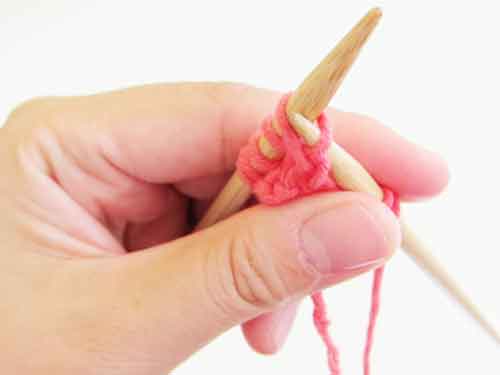
the tricky part of purling a stitch from the back loop is that instead of inserting the right-hand needle from “right-to-left,” it should actually be inserted from “left-to-right.” then, take the yarn and wrap around needle to finish the purl stitch as normal.
doing so is a bit awkward because it twists the stitch in the process. however, the twist created causes the stitch to be tighter and more stable, which is useful especially when it precedes or follows a dropped stitch.
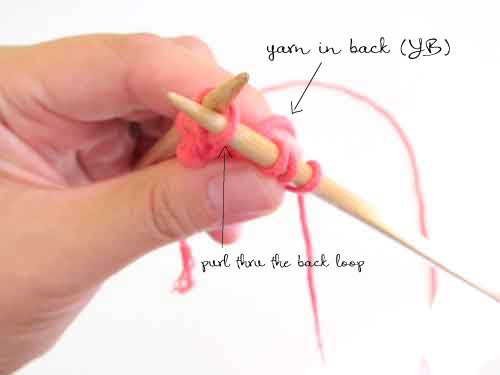
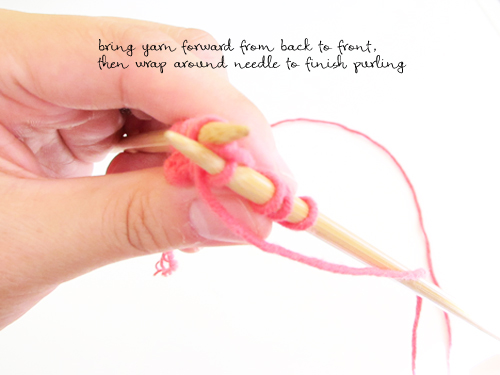
(2) yb, p1 through back loop: (note: for simplicity’s sake, we’re dropping the “drop the next stitch” in our demo). the “yb” (or yarn back) in this part of the stitch sequence is a way of creating a yarnover stitch. instead of bringing the yarn to the front of the work before purling as is standard, the yarn is left in the back of the work. the right hand needle is inserted into the back loop of the stitch, and then the yarn is carried forward from back to front (creating a yarnover) to finish purling through the back loop.

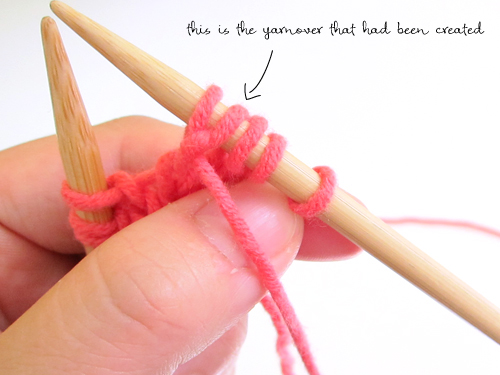
Please explain “drop the next loop”.
robin: “drop the next loop” simply means that you should let the loop slide off your needle without knitting it. it will form a hole in the fabric. the loop that’s dropped is the yarnover stitch that you had made in the previous row.
Wonderful, that’s good news…I thought so.
Thanks!
Thanks for this…it helps. However, my issue is Row 3. I’ve knitted it once, ripped it out, and then did it again but still have the same problem:
Because there are 8 K2tog in Row 3 in the section between markers, it decreases the stitch count in this section by 8.
When I get to Row 4, the pattern directions want me to Purl 22 between those same markers. I am obviously short by 8 stitches.
What am I missing? Is there some way that I should be increasing (sort of like the example you posted here with P1 through back of loop) when the directions say YF, K1?
Thanks! I’ve done lace before but these stitch directions are unknown to me!
hi dalia:
“YF” means place yarn in front. when “YF” is followed by a “K1” or “K2tog”, it effectively creates a yarn over (“YO”).
so yes, you are creating a YO stitch for every K2tog in row 3 of elise.
cheers,
emily
Thank you! Need to swatch this to make sure I’m doing it correctly. Can’t I just make a yarn over? Seems easier to me.
YF and YO are quite similar. However, the tension will be different. The hole created via a YO will be larger than a YF, as there is a slightly longer length of yarn used to create the hole.