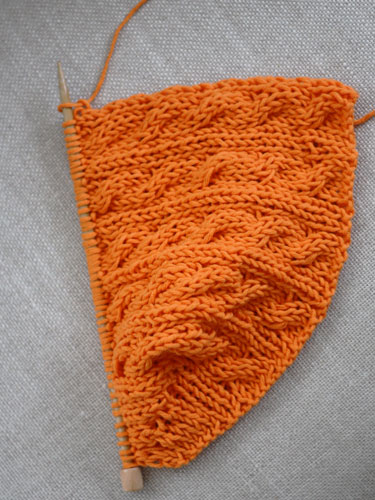
 kinda looks like a dorito, no?
we use short rows in the holland pattern to achieve its non-linear shaping. after knitting one complete segment repeat, holland looks like the picture above. it’s not flat but rather a curved wedge. knit a few of the triangular segment repeats together and you get something circular.
within the wedge example above, there are fewer rows knit on the left side (bottom of picture) of the piece than on the right side (top of picture). we do this by knitting partially across a row, not finishing it, but rather “wrapping the stitch” and then “turning” the piece to knit the next row. (in some more advanced short row patterns, you might knit to another “wrap & turn” rather than the end of a row).
in the holland pattern, we give explicit instructions about the mechanics of the short row. we think they are pretty clear, but in case it helps, we’re also including some step-by-step “wrap & turn” techniques in this tutorial.
The “Wrap”
let’s say for example that you knit every single stitch in a row on the RS except for the last 2 stitches. if you turned the piece immediately, those last 2 stitches wouldn’t be connected to the rest of the knit piece, resulting in a large gap. the “wrap” is a way to anchor the un-knit 2 stitches before turning the piece. the “wraps” are later picked-up and knit, in order to close the large gap.
a wrap can occur in two directions: knitwise or purlwise. in the holland pattern, we give explicit directions on how to perform each maneuver and give them the abbreviations: SRK (for a knitwise wrap) and SRP (for a purlwise wrap). more intuitively, however, the direction you wrap your yarn is determined by where your working yarn ends up on the last stitch before you turn the piece.
if the last stitch before you turn the piece is purl stitch, the working yarn should be in the front of the piece. as such, you would want the working yarn to end up in the front of the piece after you have completed the wrap. we call this a SRP.
similarly, if the last stitch before you turn the piece is a knit stitch, the working yarn should be in the back of the piece. as such, you would want the working yarn to end up in the back of the piece after you have completed the wrap. we call this a SRK.
Step-by-Step SRK
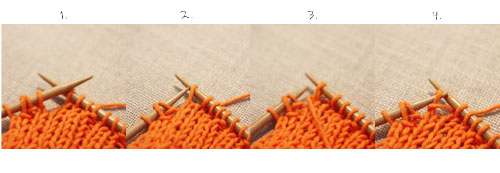 1. start with yarn in back of work
2. slip next stitch purlwise from left-hand needle to right-hand needle.
3. move yarn to front of work.
4. then transfer same stitch from right-handle needle back to left-hand needle, and move yarn to back of work again.
you’ve just completed a wrap! once the wrap is complete, the piece can be turned.
Step-by-Step SRP
1. start with yarn in front of work,
2. slip next stitch purlwise from left-hand needle to right-hand needle.
3. move yarn to back of work.
4. transfer same stitch from right-handle needle back to left-hand needle, then move yarn to front of work again.
you’ve just completed a wrap! once the wrap is complete, the piece can be turned.
Closing the Gap
when you next come across the wraps that you made previously, you’ll need to pick up the wraps and knit them together with the stitch they are wrapped around, in order to close the gap created from the short row. and because we like to complicate matters . . .
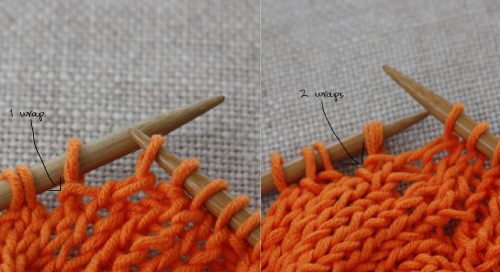
in the holland pattern, there are sometimes 2 wraps around a stitch rather than just one. where there are two wraps, we experimented with knitting just one out of the two wraps, and it turns out that the gap is better closed and sturdier if both wraps are picked up and knit with its stitch.
again, there is a knitwise and purlwise technique to closing the gap. we abbreviate these as CGK (close gap knitwise) and CGP (close gap purlwise) in the holland pattern.
we are showing only 2 wrap pick-ups in the photos below, but whether you pick up 2 wraps or 1 wrap, the concept is the same.
Step-by-Step CGK
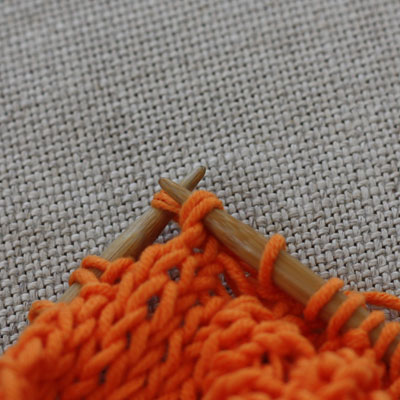 1. insert right-hand needle from front to back into the front loop of the wrap(s).
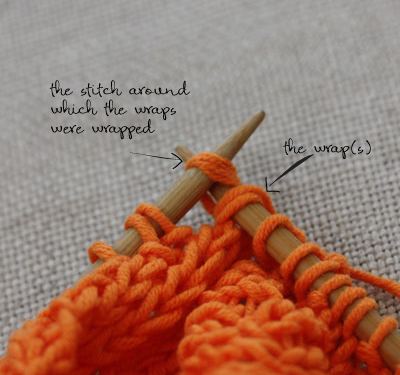 2. with the wrap(s) still on the right-hand needle, insert the right-hand needle into the “stitch that the wrap(s) had been wrapped around”.
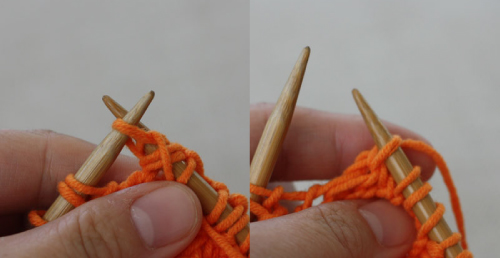 3. then knit together the wrap(2) and the stitch. yay!
Step-by-Step CGP
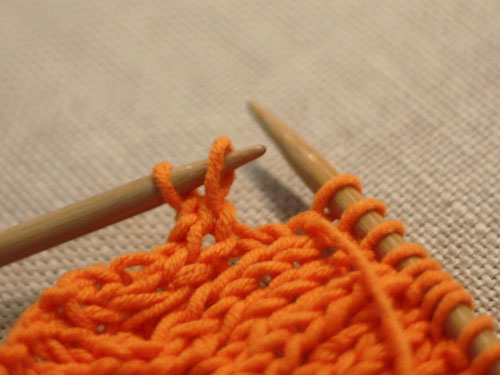
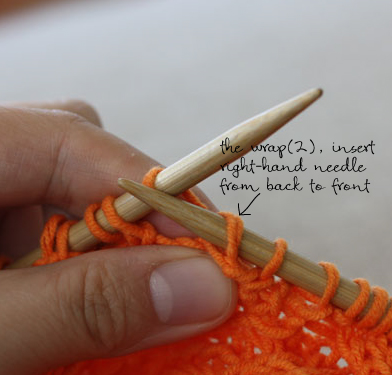
1. CGP is similar to CGK with the main exception that you MUST insert right-hand needle from back to front into the back loop of the wrap(s).
2. then, move the wrap(2) onto the left-hand needle and purl the wrap(s) and “stitch around which the wraps had been encircled”, together!

One thought on “tutorial: short rows”